23/01/2017

Creating the Condor MkI

Just a little post showing the design process of one of my earlier creations :-)


It was one of my earliest pieces and as such taught me a great many lessons in what 'not' to do.

10/06/2014

Sensational Mosaics


Spiral

It's rare I praise my own work, but there have been times lately when I've been very surprised at what I have been able to create.  My mosaics sparkle in the sunlight or, as above, the full effect of the iridescent tiles can be seen.
  • I've taken things which were nothing.
  • I've added to them.
  • I've built them up gradually
  • And finally covered them in mosaic designs which required little or no planning.
  • I have created beauty where there was nothing.
  • And I'm happy to have brought some beauty into this existence :-)
Only lately have I completed two mosaic projects.  The Spiral Mosaic (seen above) and Step No. 8 Vertical Face (seen below).

The spiral was created when I arranged six cut mirror tiles and then built out the design with similar cut tiles; filling in the gaps with glitter tiles and iridescent tiles.  It depends where you stand and where the sun is to get the full effect as seen above.  But it is a beautiful effect when you find it :-)

The Spiral was created to fill in a gap where two coping stones meet and to cover a hopper which forms part of the garden drainage system; the latter also being a feature in itself as an artificial riverbed of pebbles and large shells.


Step No. 8 Vertical Face


The step mosaic was one I created with sunshine in mind.  The oranges, reds and yellows merging towards the centre before converging with gold and silver mirror tiles.  The central design is another of my unplanned creations.  I don't know what it is, nor its meaning, but it gives the feeling of something dynamic and possibly advanced.


The Riverbed


Although the feature functions perfectly as drainage for excess water, it's still a work in progress project.


Peace and Happiness x

20/01/2014

Pussy Cat Pussy Cat, Where Have You Been???


This was one of a pair of cats I originally bought a number of years ago.  The first was tiled using a gold and red theme.  I had originally intended to do something similar with the second.  However, other projects took priority at the time and this other cat has been sitting around ever since.  Only recently have I had a go at giving it some life as intended; though the colour scheme and design is quite different from the first.

I'm utilising a mostly silver and purple mirror colour scheme with highlighted steaks in red mirror.  It's a theme I've used before but not for a long time.  I am using silicon glue this time which is far more flexible when it comes to fixing tiles.  I will certainly be using a darker grout than usual but have not decided on the type.  I may go for the glitter grout I have been using so often lately or smooth  anthracite.  The latter is more suitable for use outdoors; however I have used the glitter on small outdoor projects before now.

As well as the above cat I have also being working on more glass gem mosaics which can be seen below:


This was a silver metal bin which I thought would look impressive with glass gems attached.  The idea here, and with other similar projects, is that the gems and the reflective substrate reflects light back but in a multitude of colours.  I didn't do the lid as it may have made it too heavy to allow the opening mechanism to function properly.  Perhaps lighter weighted tiles could be utilised here?


The next image shows three picture frames which I decorated with coloured glass gems.  The frames had mirror surrounds making them perfect for the effect I had in mind.


18/02/2013

Body Adornments and New Projects

Mosaic Medallion


Now see if you can guess what substrate I used for this one ;-)


It's a design made up of cut and whole glass gems with a resin crystal in the centre.  I've lately been experimenting with cutting these glass gems as you can make much more intricate patterns than if left whole.  It's a shame I had to grout this really but really it's the only way to keep it all together.  Mind, the finished design still has a wonderful effect to it.


Once again I have used anthracite glitter grout to finish the design.  The resin crystal now had glitter paint behind it to add to the effect.  I am still trying to find a suitable thing to hang it with that would be strong enough to take the weight without putting pressure on the neck.  Currently it is utilising an adapted hanging basket chain!  But, due to no help on this problem whatsoever, I've had to improvise with what I could find.


This is the back using a much more simpler pattern.  It is designed for comfort on this side; though really it could be worn either way round.

The rear of the substrate was finished with glitter paint which adds a sparkly effect to the gems which sit on top.

Mosaic Clock


This started out as simply a plain black clock.  I painted much of it silver with a view to placing glass gems above so that the silver shines through.  I debated taking them right to the centre under the pointers but in the end to be on the safe side, I opted to use flat glass tiles bought from the local DIY store.  This was to give allow the pointers to still be able to move round the face unrestricted.


The design for the centre was not planned.  I was trying to get get spirals that emulated the waves of the sea.  It's a sort of adaptation of my scroll designs on my step mosaics.  The clock isn't 'quite' finished; the gems need cleaning still and a bit more grout needs adding to finish off.  The pointers may also need some attention before hanging.

Spiral Design Mosaic Vase


I began working on this late 2012 but it got put to one side as I began doing more elaborate designs.  There was a while before I really had any ideas on how to complete this one.


Only the upper part has been done and as you can see I was experimenting with spirals with this vase.


The lower half has recently been painted silver.  I wish I'd done the same with the upper half but at the time I wasn't really experimenting with backings yet.  I may well adjust the top to make it a little more interesting though.  I'm already having thoughts about different designs I could use and connect it to the lower half.

The Head


This was a glass head which I have now painted silver.  I've wanted to mosaic something like this for some time but have never found a suitable substrate until now.

There is no planned design for this (I haven't 'planned' any mosaics in ages as it's been more fun to just do spontaneous patterns) but I have one or two possible ideas.  I am still going to be utilising glass gems and will probably be using anthracite glitter grout again.

New Homeware Mosaics

A slightly different sort of mosaic art going on here.  Just a bit restricted as to what materials I can use where I am at the mo, so I had to improvise with what was available.  Although designs started out as somewhat basic, I learned new and more intricate techniques alone the way.

Since they are quite easy to obtain I began using glass gems to mosaic with, mainly on clear vases at first, but lately have been applying them to shiny or painted surfaces as the effect through the glass can be quite radiant when in the light.


Glass Gem Mosaic Vase 1


This was the first vase I decorated.  It really needs to be seen against the light to view the full effect since the substrate is a clear glass vase.

Glass Gem Mosaic Vase 2


Like the first this used a clear vase with a sliver band around the top; hence why the camera flash highlights the top much more.  This time though I tried a little experiment.  I found this box with glass sides which had an interesting pattern covering it.  It wasn't very well made but I thought it could be used to make something more interesting here.  So I combined both the vase and the box and covered the lot with glass gems.


Although I began this project just after the first vase I only completed grouting and cleaning it early 2013!  this was due to a number of other projects I had going on in which I was trying out now and better techniques.

Fishbowl Mosaic


This was done by using glass gems to cover a fishbowl vase.  Like the others it's a very basic technique but it does have a rather dramatic effect when used with tealights :-)


I would love to do another fishbowl, though this time I think I'll be trying a more advanced design as I'll be showing you later :-)

Chrome Plated Storage Jar 1


This was a slightly smaller project and I used a small chrome plated glass jar as a substrate.  I wanted to see the effect through the glass gems and as a result decided to continue to decorate shiny things to achieve the best results.

All of these mosaics shown here use anthracite glitter grout which in itself adds a bit of sparkle to the finished design.

Another 'Step' Further

Condor Step Mosaic


This is another mosaic for one of my garden steps that I am creating.  Although I much prefer doing these outside in the sunshine, the weather doesn't always permit me to do so!  So this time I'm using two sheets of foamboard so at least it can be completed in the dry.

It is a mix of shades of blue porcelain and white porcelain tiles.  It follows similar themes to my Yin Yang step mosaic with the wave like scrolling on either sides.


You can just see the wee little condor I used to trace the outline here.  I think I'm rather obsessed with them considering how many times I've used them in my art.  But even though it's not native to the UK I find it such a gracious, and some ways, 'spiritual' creature so it feels right to include it in my creations :-)

04/01/2013

Coping Stone Mosaics and Walls

As you know I have been working to mosaic the coping stones in my garden to make it more attractive.  Four of them are already complete with another still work in progress and three still to be begun.  Here I present two of these and one wall.

Step Coping Stone Right No. 3 


The first show is one that sits at the stop of the steps on the right.  This is actually a low wall I built myself over the summer.  There were no walls at the top before though there was evidence that there might have been low coping stones there at one point.  The soil level here on the right is level with the steps and could easily spill over.  I didn't plan it as a wall but it just sort of 'happened' as I was placing a barrier there to hold back the soil.  I also created a similar low wall on the other side to match, though the soil level there is much lower than the steps.  This one is still waiting to have mosaic applied.  The top step also needs raising to make it level with the others; plus the fact that the surface is heavily deteriorated.

Above: The top step as seen from the lawn. It has been dug out in the foreground to allow the step to be extended into the garden.


This low wall mosaic consists of a winding pattern made up of mirror tiles with blue and green glass gems filling in the gaps; there are also some clear glass gems above individual mirror tiles.  A silver-grey grout was used to complete it.  It took ages to clean off the excess grout due to me not being present and lots of bad weather.  But I'm now quite pleased with the result and cannot wait to start on more :-)

Step Coping Stone Right No. 1 


This is one of the longer coping stones which runs by the lower steps.  Apart from the side there are no tiles used on the top.  It consists of glass gems (blue and clear) and glass shapes consisting of moons, suns and shells.  Some of these have beautiful rainbows in them and really look fab in the sunlight :-)

I still have to finish the side of the coping stone and fill in a few minor pits where the grout was not present.  But these are only small things that can be done at a later date :-)


Like the coping stone opposite the design features 13 fish swimming downstream.  But this time they end at glass shell shapes (the shore?) and at the end is a sun/moon feature taking on a circular pattern.

Steps Wall Right No.1 - Peace and Happiness Mosaic


This is a mosaic I did rather quickly in September 2012.  It's quite a basic style using coloured and clear glass gems.  This mosaic can be seen very clearly from the window and the idea being that one would see this every morning; hopeful reminding oneself to include that in ones life :-)

As you can see there's still a bit of work that needs doing and the far right hand side needs grouting as well as some infilling.  I may add some of those polished pebbles to add some further interest to the area.

Peace and Happiness x

Yin Yang Step Mosaic


This is one which I actually created towards the end of the summer; however, it's only recently which I've had the chance to clean it up and photograph it properly.

For the first time I used non-glazed porcelain tiles as it was on a surface I didn't want people slipping on.  It features on one of the steps in the garden and hopefully the first of many; I am currently working on another as we speak.

The mosaic takes the theme of the sea again with its wavy blue patterns and shades.  I've actually only used two colours, but it's amazing what you can achieve when mixing shades :-)  There is a scroll-like border on either side which could also be used to represent the waves in the ocean.

The centrepiece is another attempt at Yin Yang, but this time in blue.  I'm hoping to continue the blue sea theme on other steps as well.


At the wall ends I've begun adding those flat polished stones you can get.  I've found them very good for patching up those hard to mosaic areas as well as adding an interesting infill between designs :-)

19/05/2012

Garden Wall Mosaics


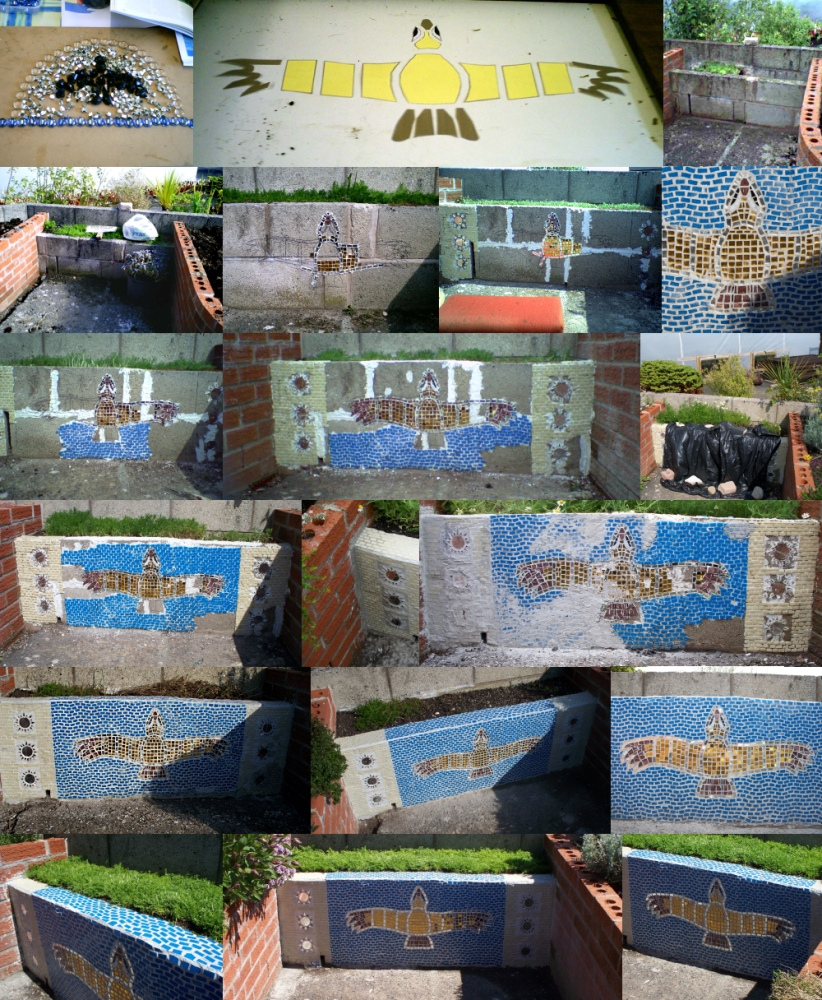
I had always planned to cover the plain coping stones in our garden with mosaic but I hadn't intended to tile directly to the stones.  However, since we've had such good weather lately, I was feeling spontaneous and creative, so I went out and created two mosaic coverings.  One was a pebble mosaic which I'd only planned a few hours earlier on that day.  Even the word I included only came into my head as I was actually doing the mosaic!

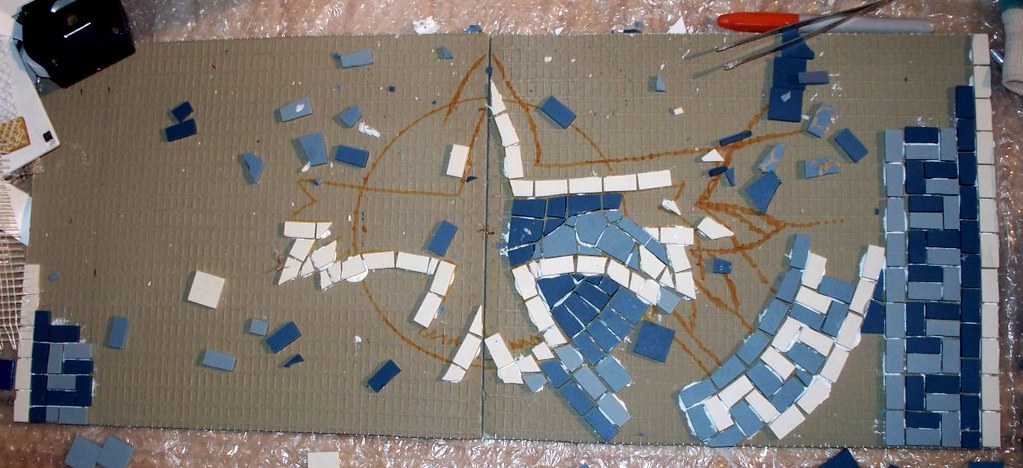
The second mosaic was another spontaneous creation and because the design is a little more complex I'm actually still working on this one.
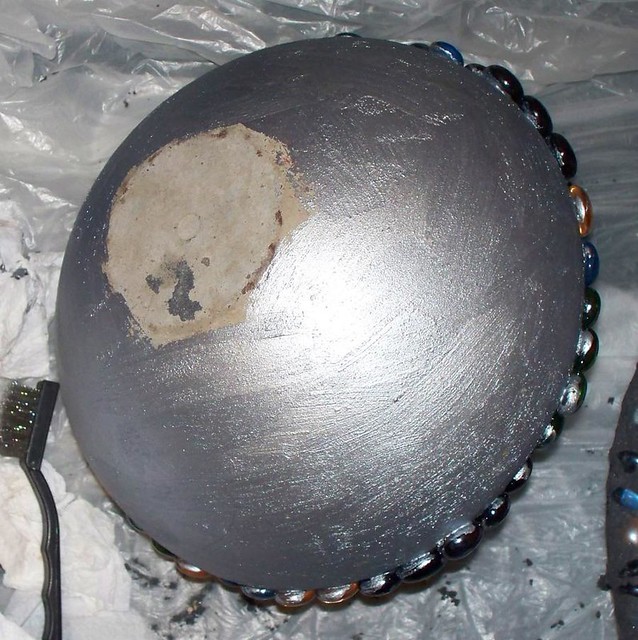
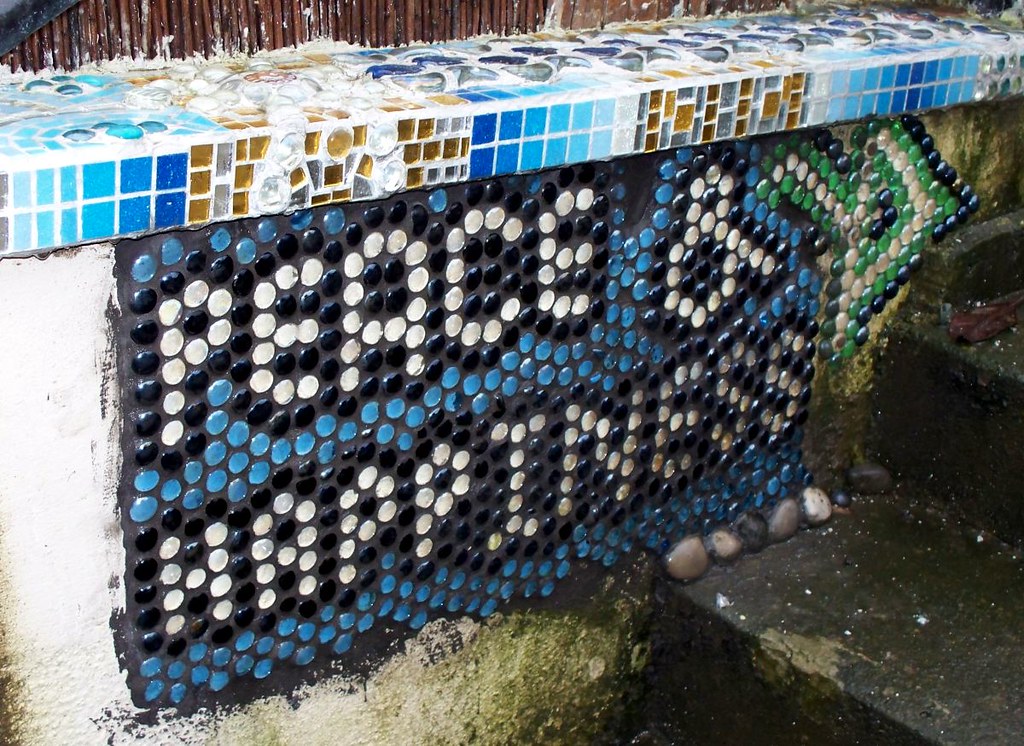
The Healing Mosaic


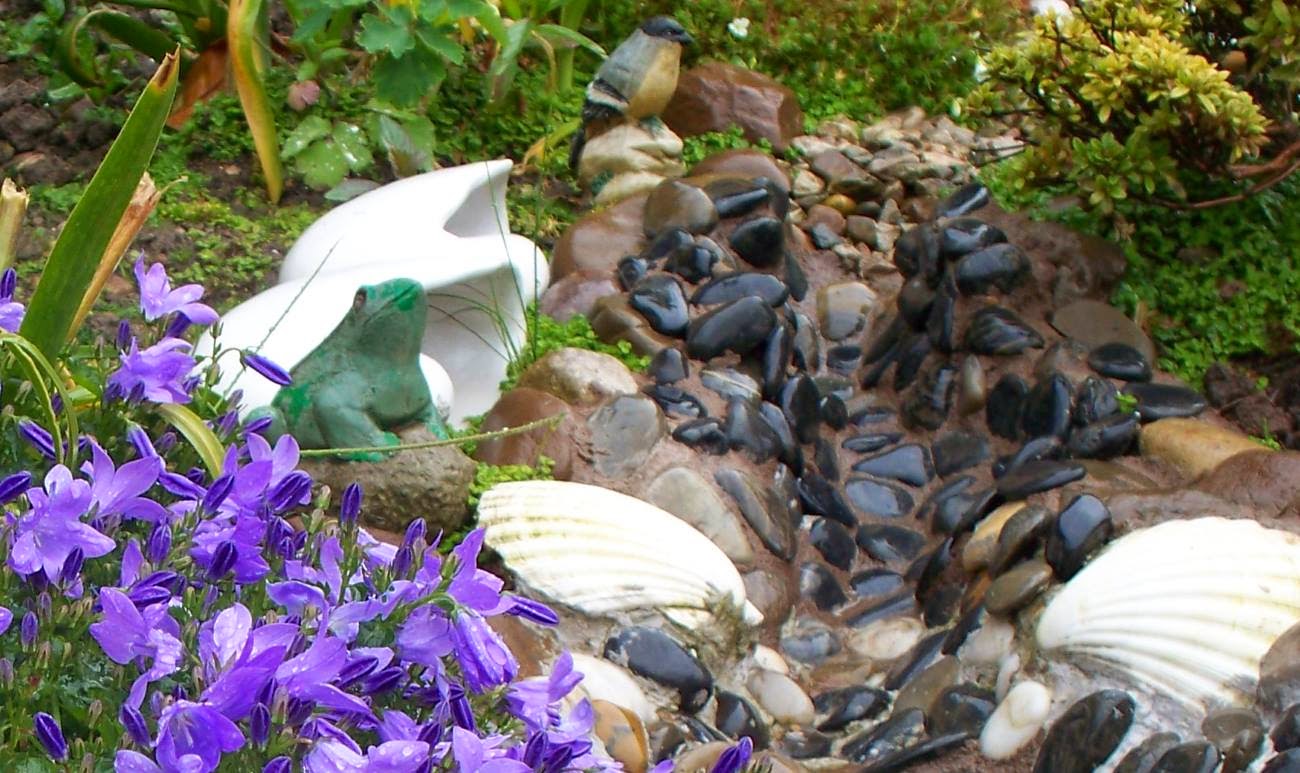
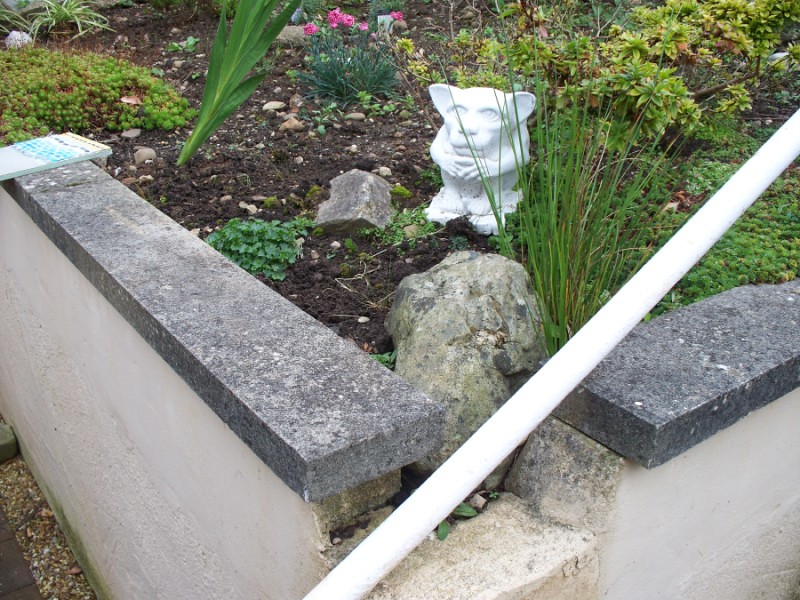
This particular wall didn't actually have a coping stone on top and is actually higher than the wall next to it.  It also sloped down to the other wall with a very crude and uneven surface.  I therefore decided that applying a pebble surface would help soften this bland surface and it has turned out rather well :)


The idea of including a word only came to me as I was actually applying the pebbles to the wall!  I'd wondered about adding darker pebbles to make a pattern as I was progressing and then I thought:

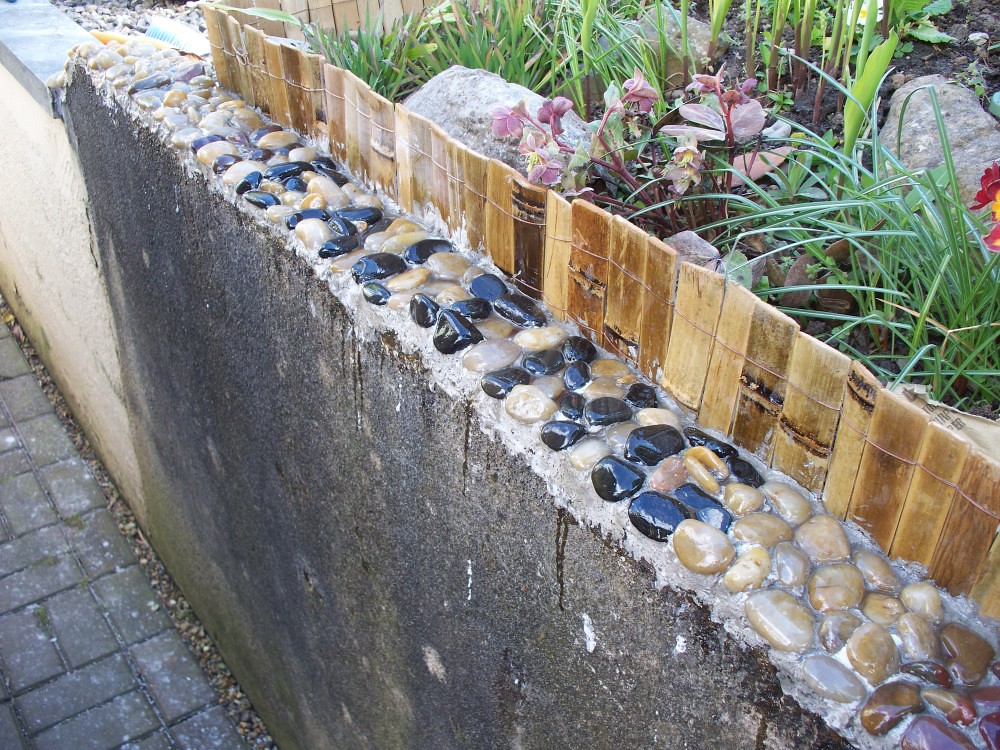
"Wouldn't it be lovely to include the word 'health' or 'healing' to the design using the really dark stones"

So this is how it turned out.  The 'H' is more of a brown colour as I'd not realised I had more of the darker pebbles to complete the mosaic.  It does emphasis the beginning a lot more; even if it was unintentional :)

Even though the pebbles were already polished I still added a couple of coats of Yacht varnish to seal it all.  Plus, it does make the surface more like a river bed now :)  And with that I come to my 2nd wall mosaic :)
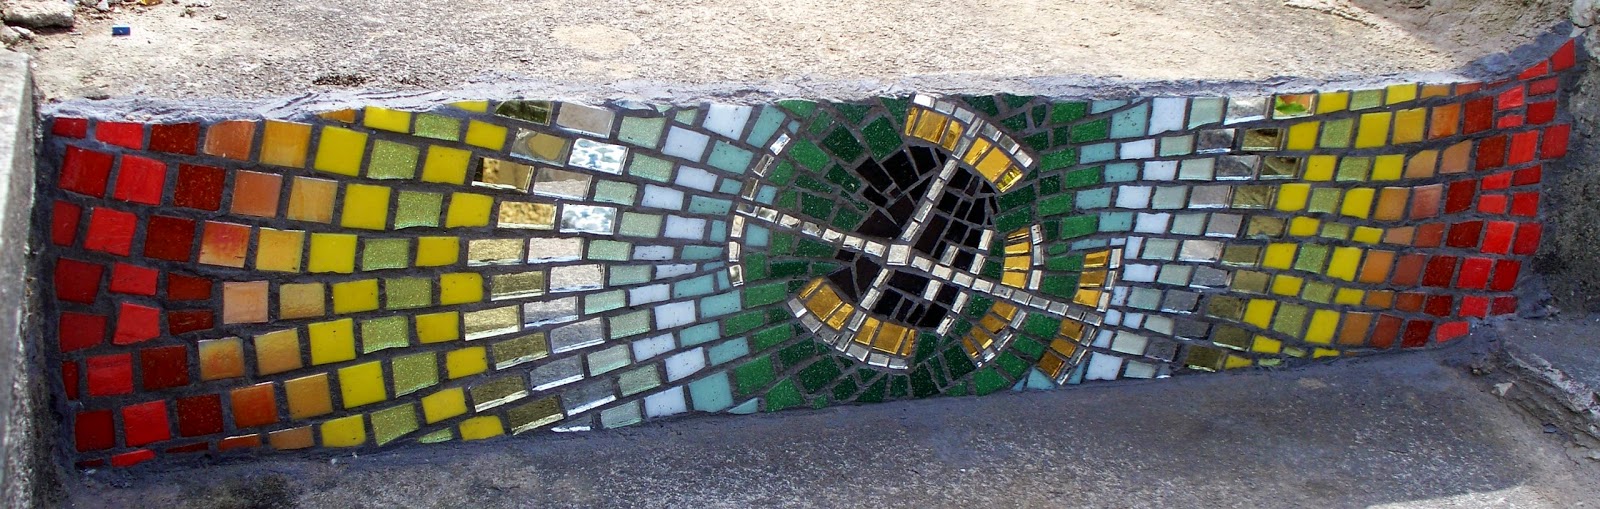
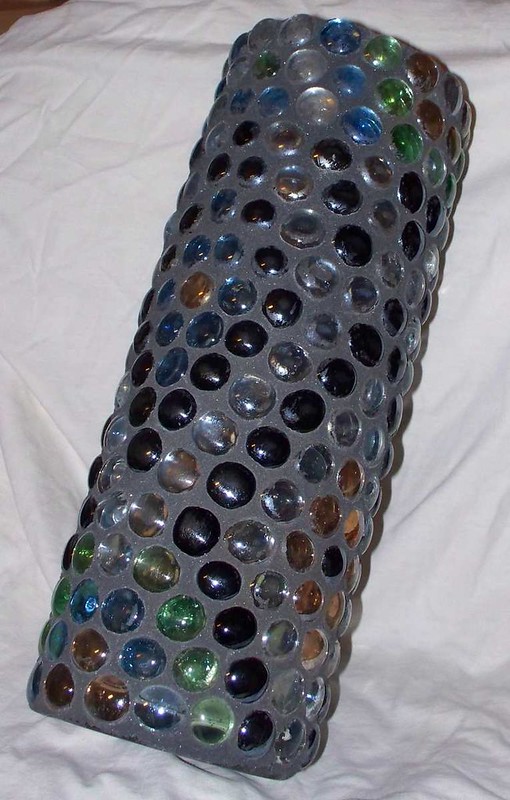
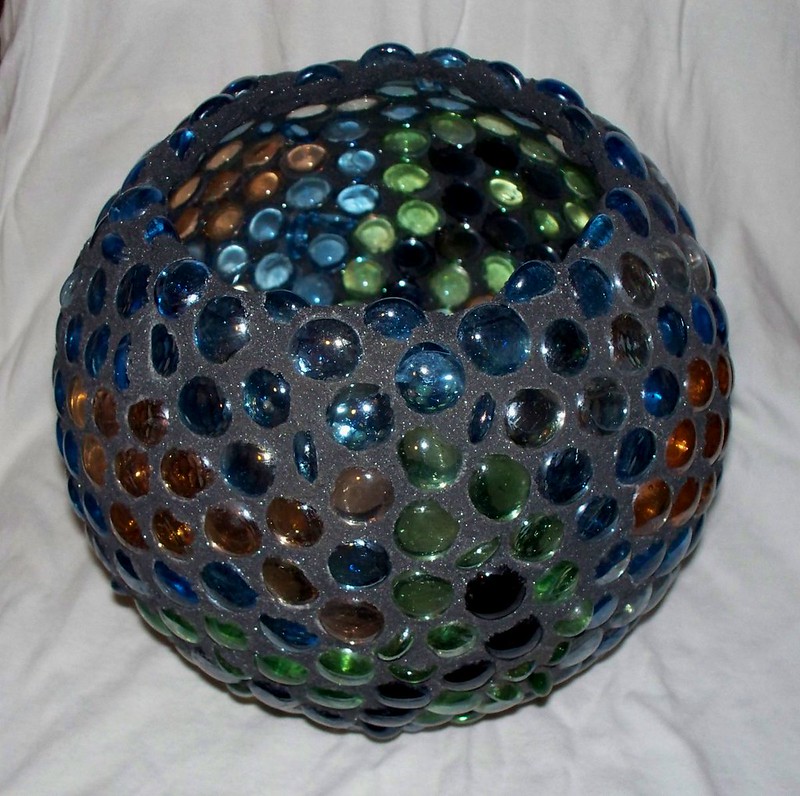
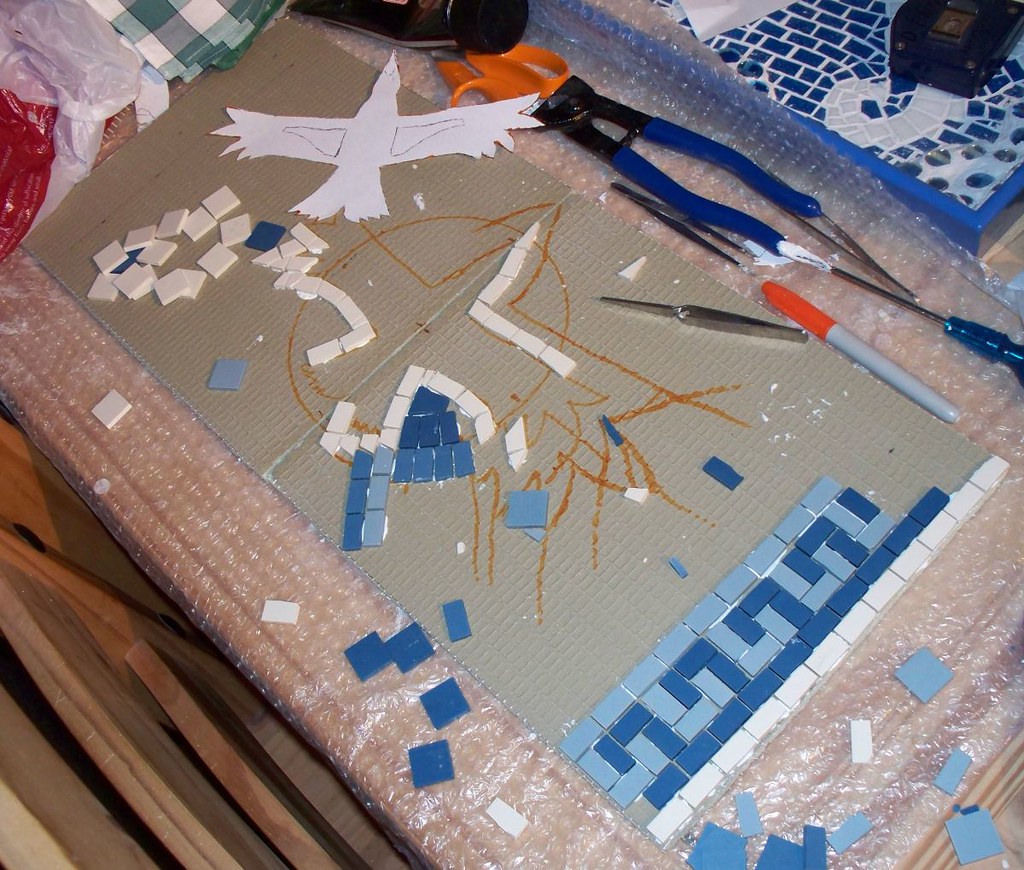
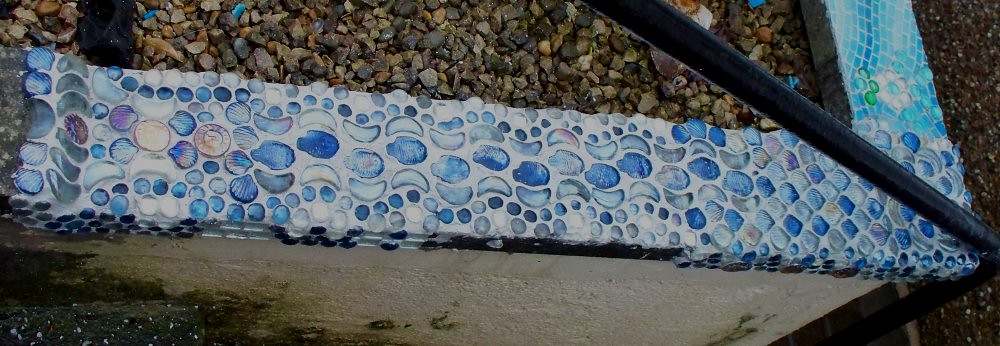
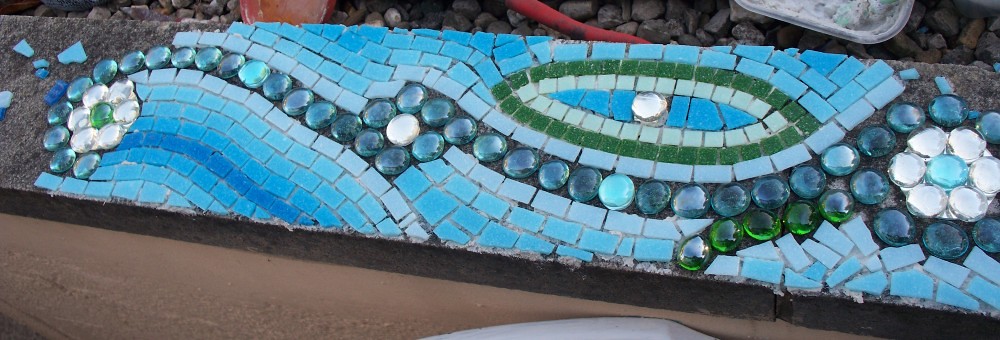
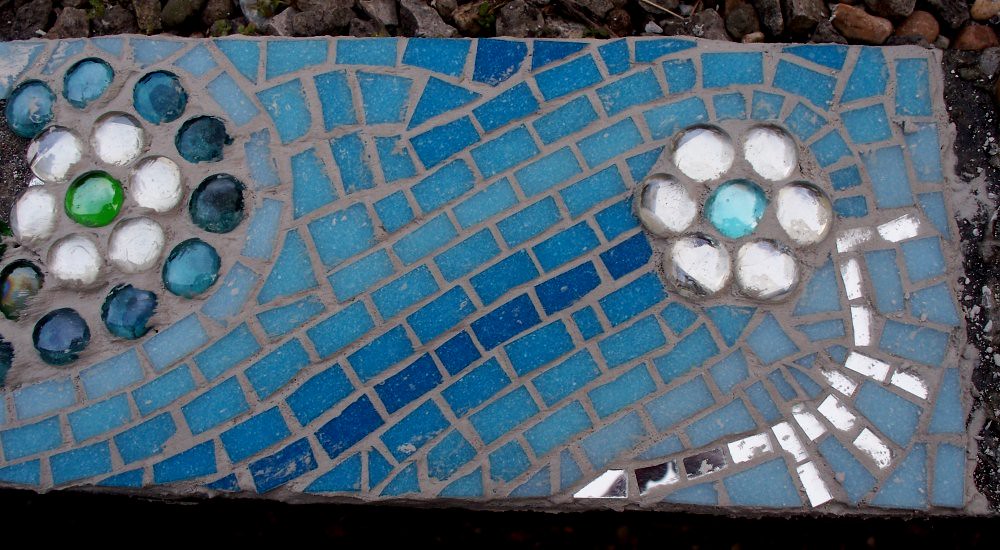
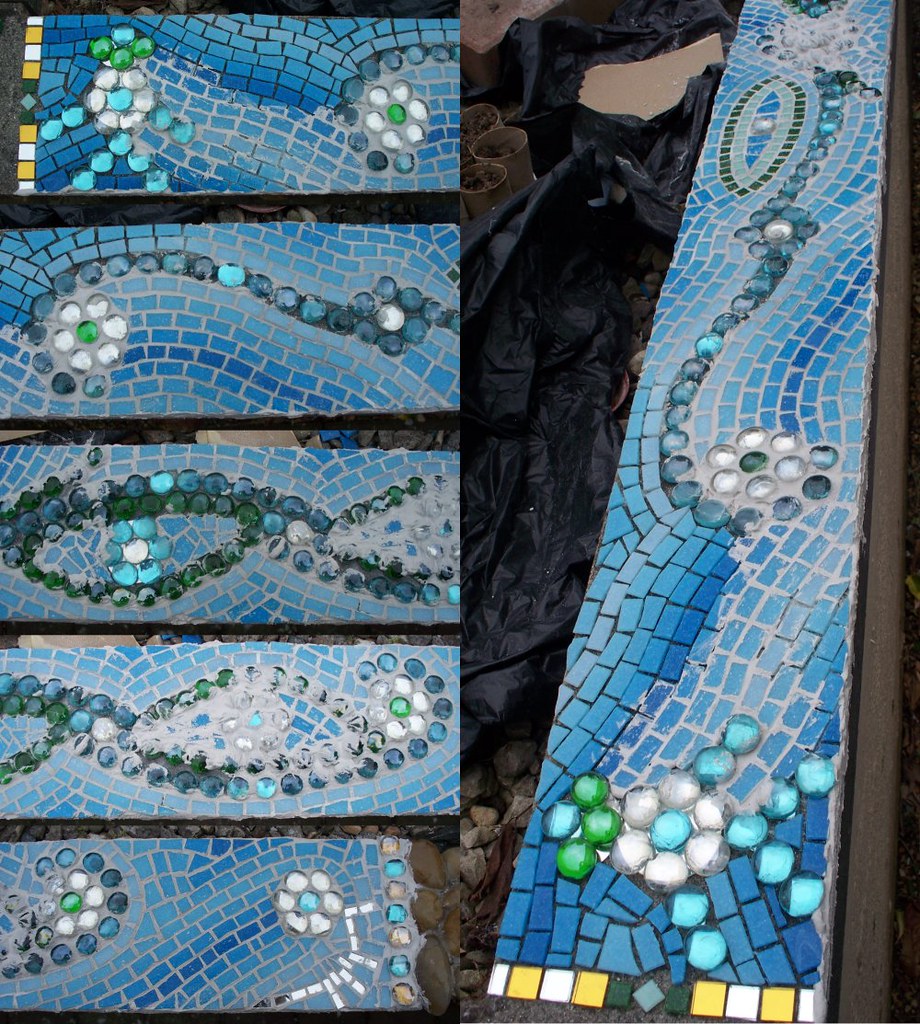
The Blue Mosaic

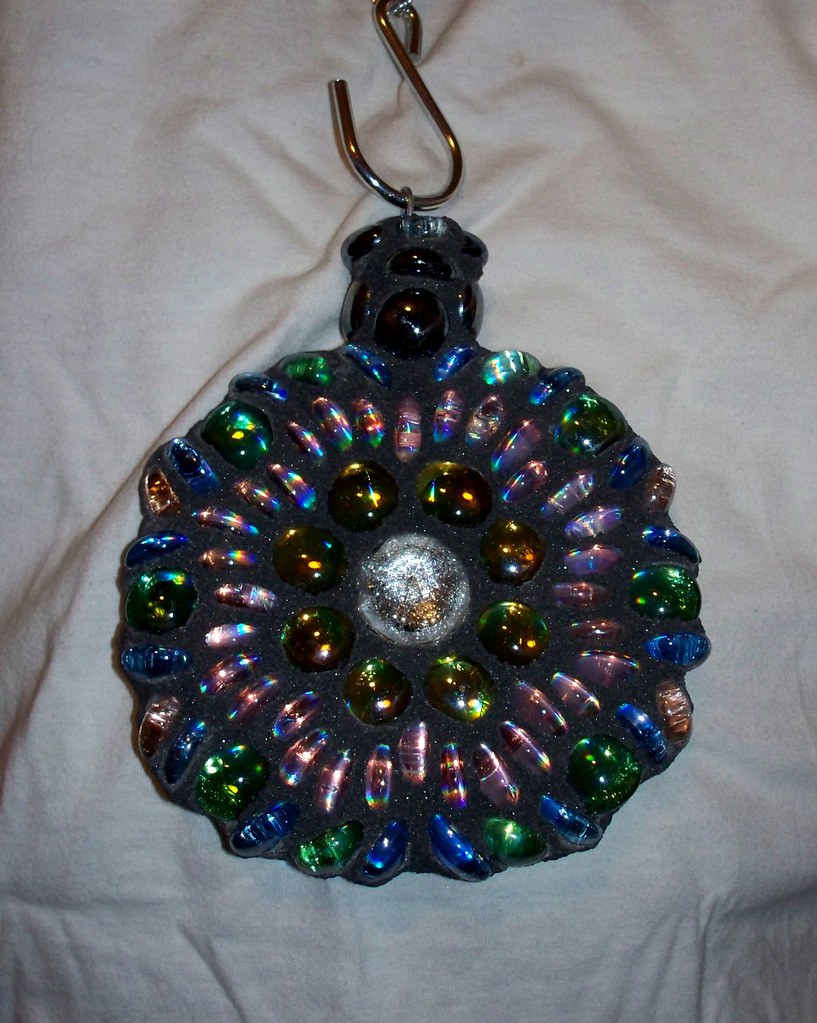
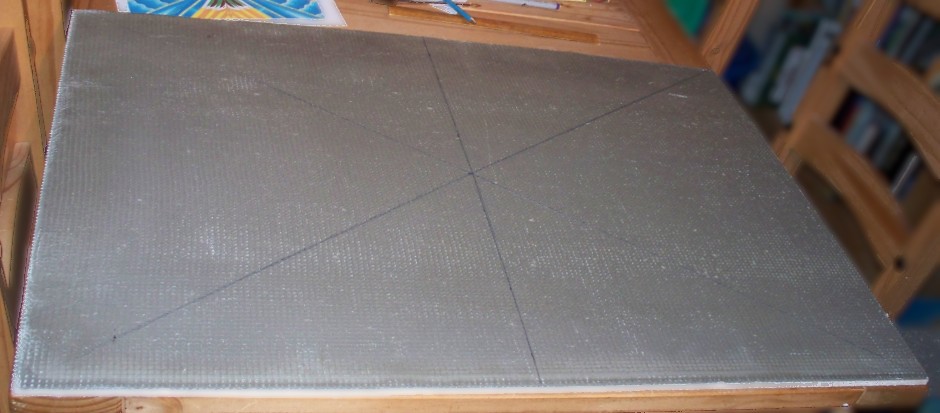
Well, I was originally going to mosaic pieces of foamboard and then attach them to the coping stones later in case of bad weather.  However, the sun has been out a lot more than expected this year and I was just feeling so creative.  I just went out there with some glass gems and some spare round mirror tiles and created away :)


This is very much a mixed media mosaic and it's not something I've attempted in a while.  It's also been quite experimental but the effect has been amazing so far.

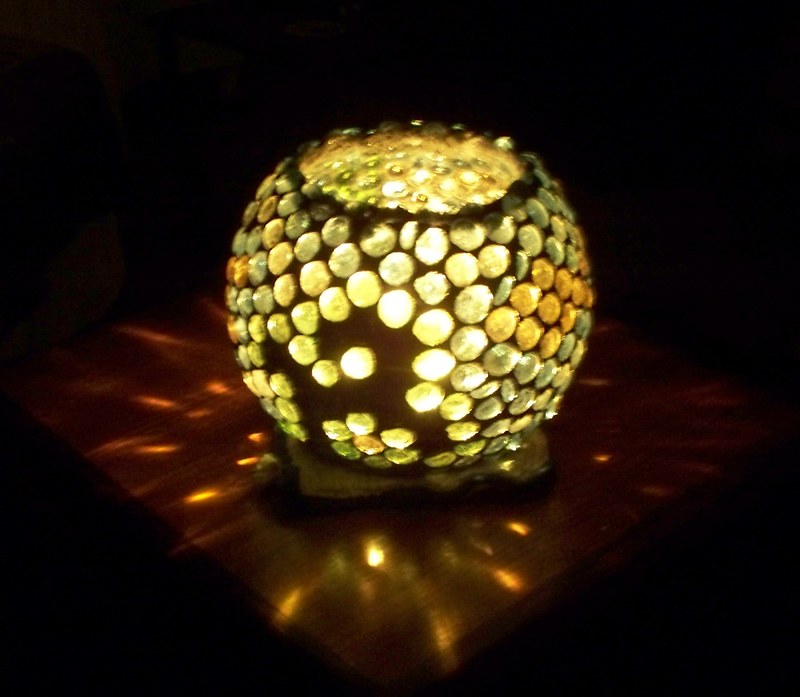
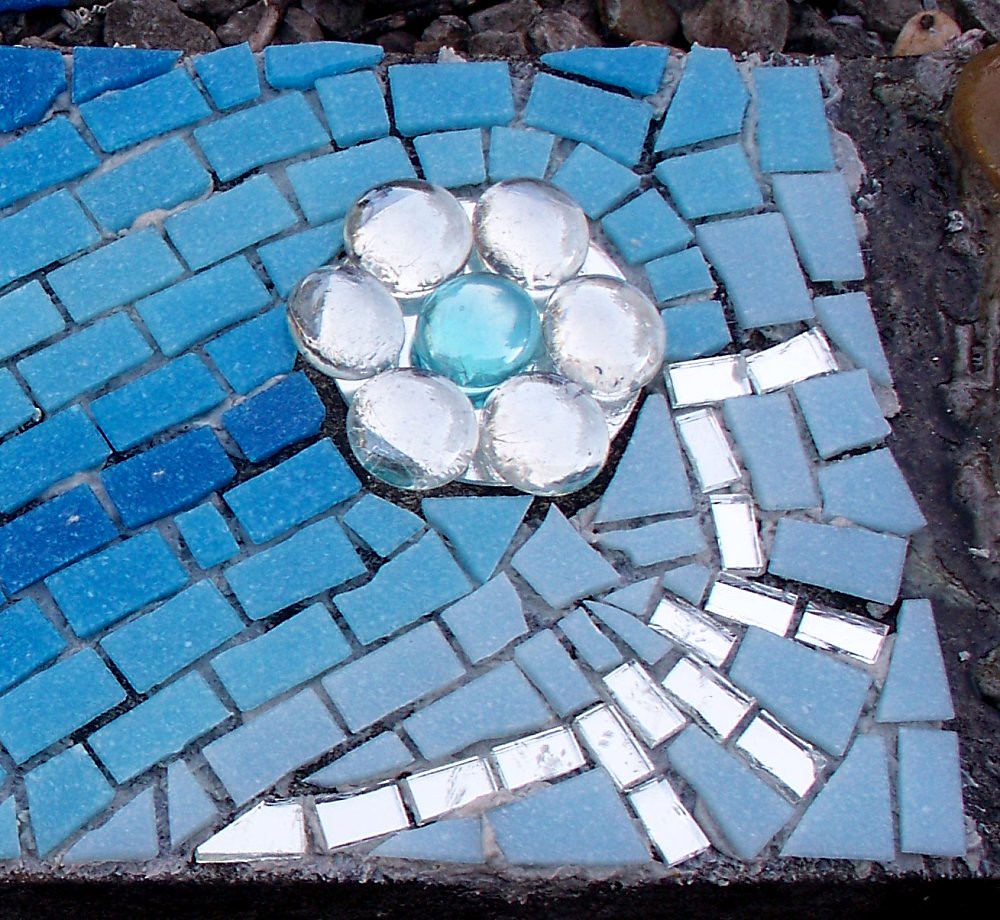
You see, I had these 5cm round mirror tiles and I'd found in the past, that because of how thin they are, they've cracked in the frosty conditions.  Now (I actually thought of this whilst working on yet another mosaic) I thought "What if I place glass gems on top of the mirrors in order to catch the sunlight?"  And it has so far been quite dazzling (in a good way).  This way the mirrors are kept secure underneath but still allow light to reflect off them through the glass gems; and even if the mirrors should crack, they'll still be in one place and still function as intended :)


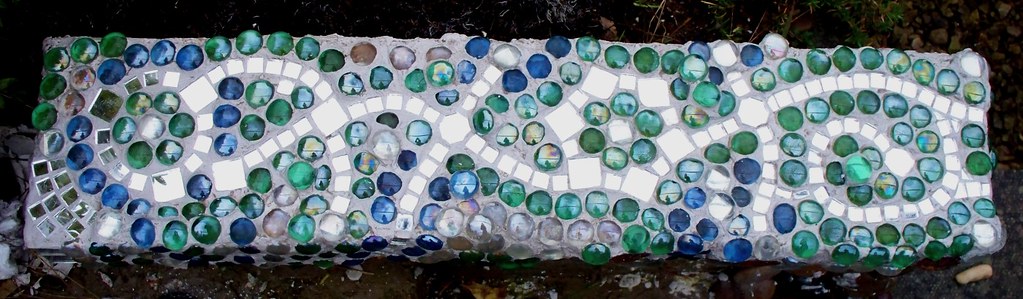
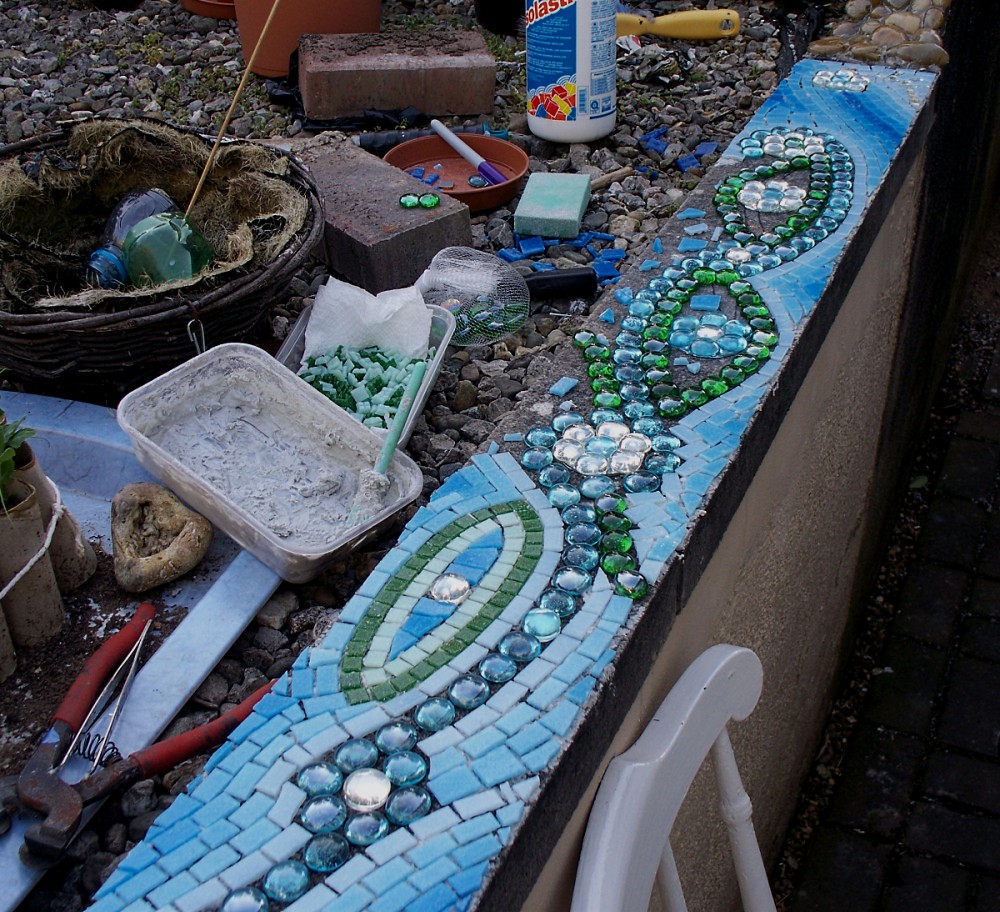
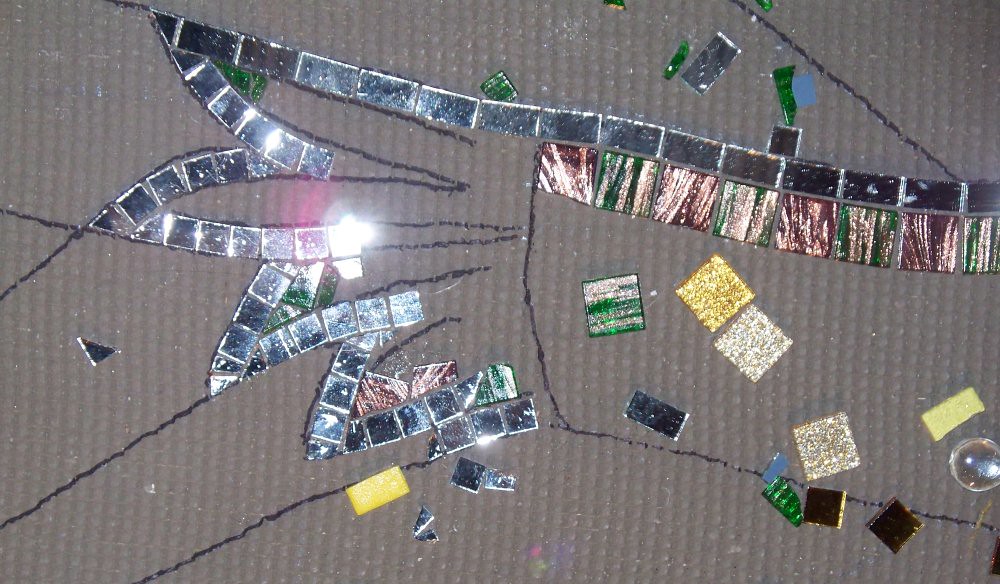
I have used a mixture of coloured glass gems here; mainly blue, clear and green.  I didn't add mirrors to every one, but as well as the big mirrors, I also added smaller mirror tiles to underneath the odd glass gem.

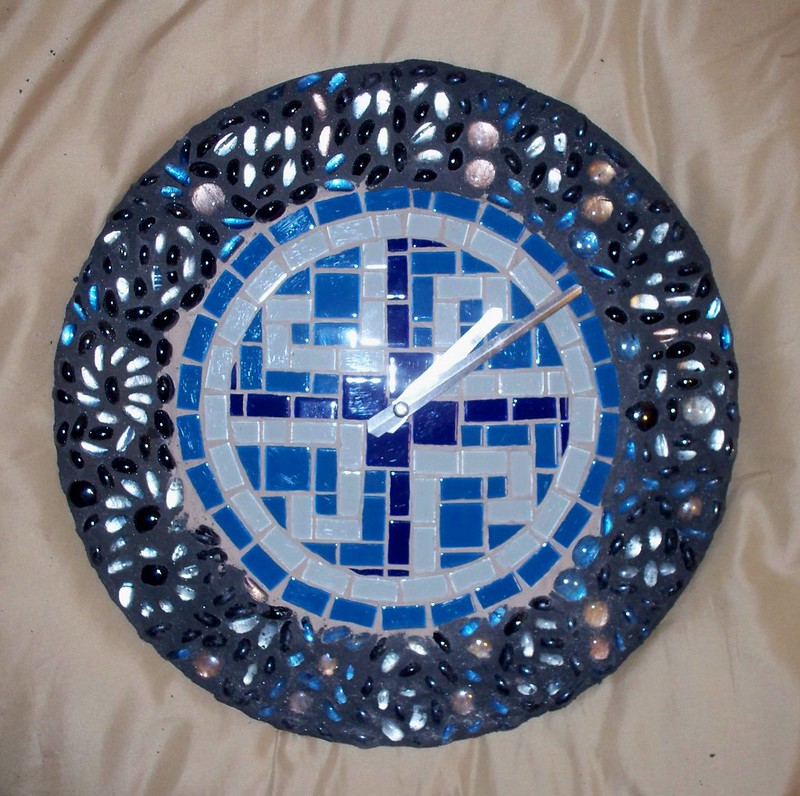
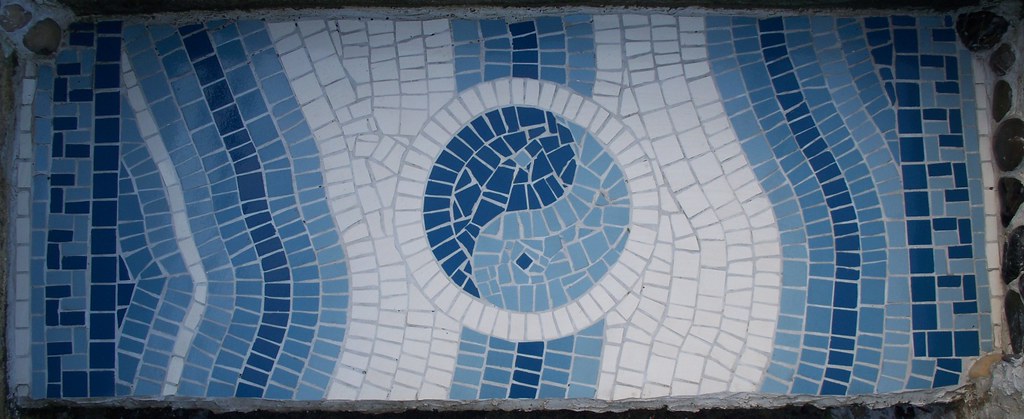
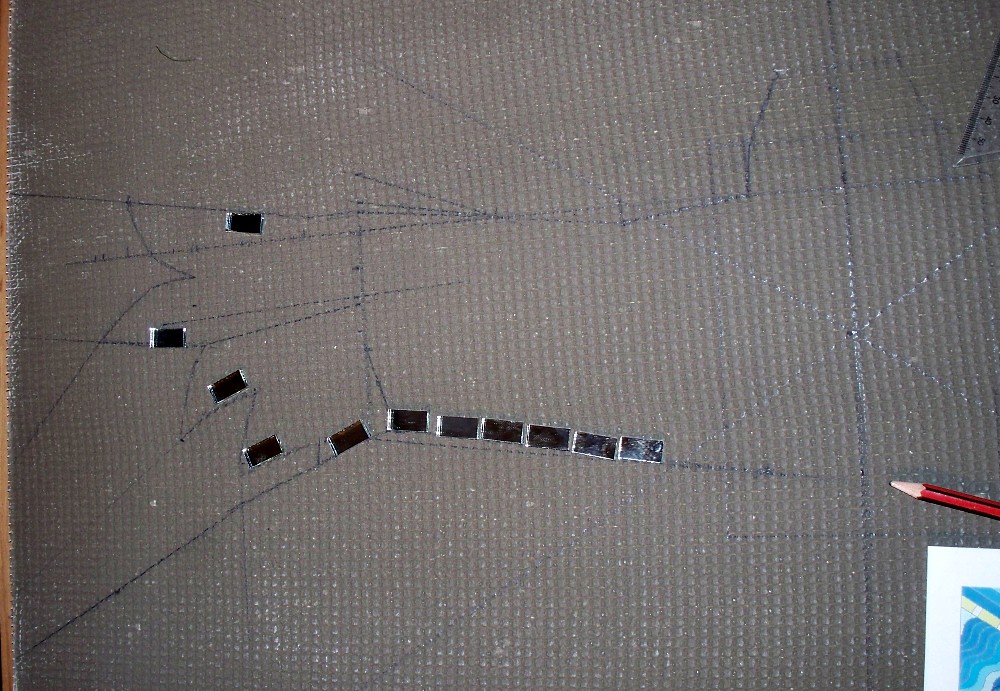
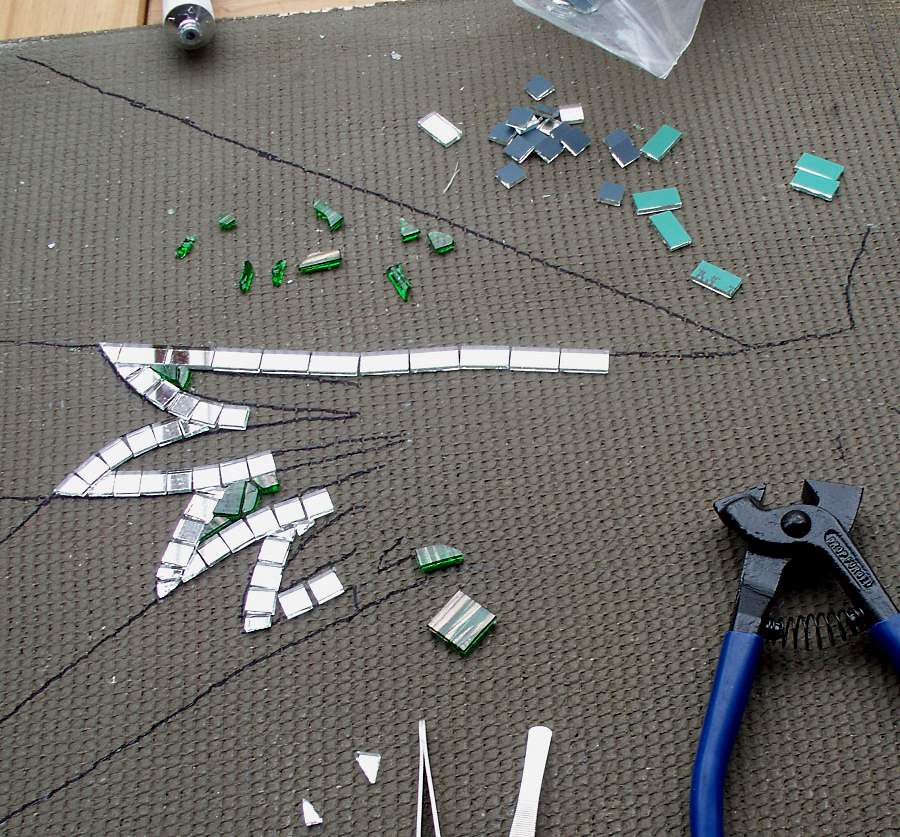
The gems were all added first.  The tiling came later.  I used the same technique as I did for my Yin Yang mosaic.  This has allowed a shaded but wavy effect to be included.  In a way it represents the sea, but also a series of eyes, and whatever else people can make of it :)


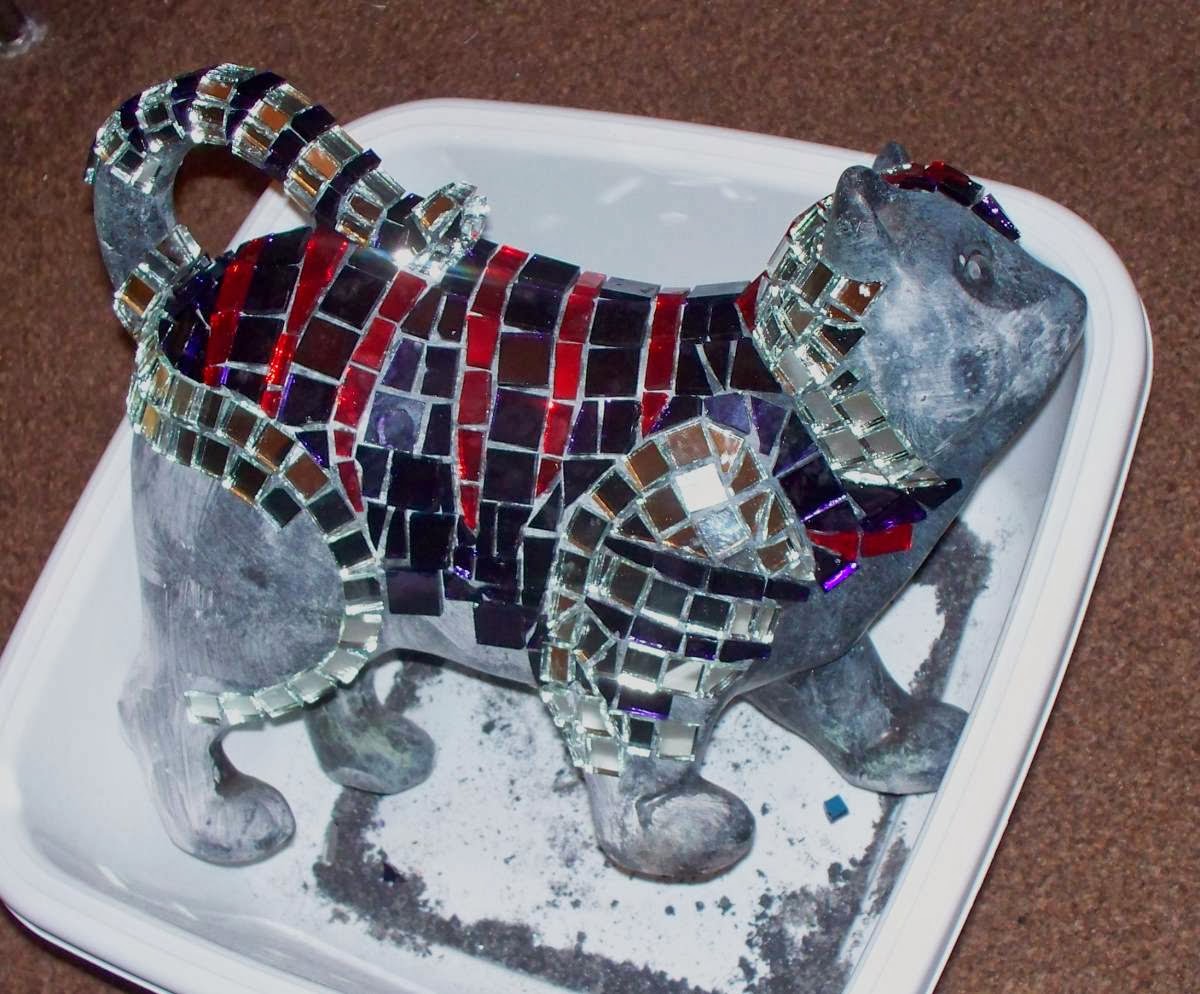
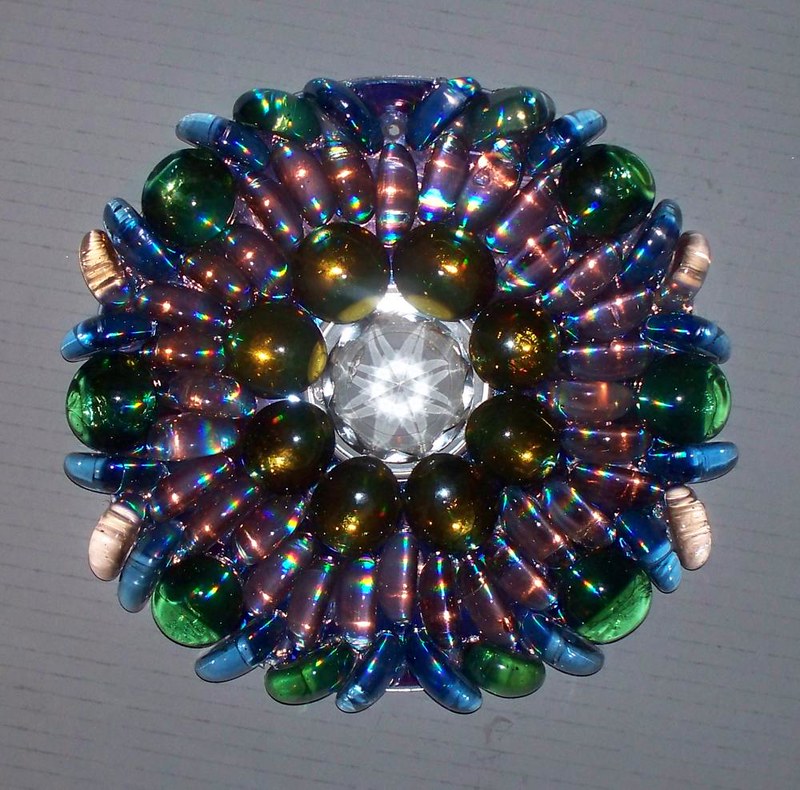
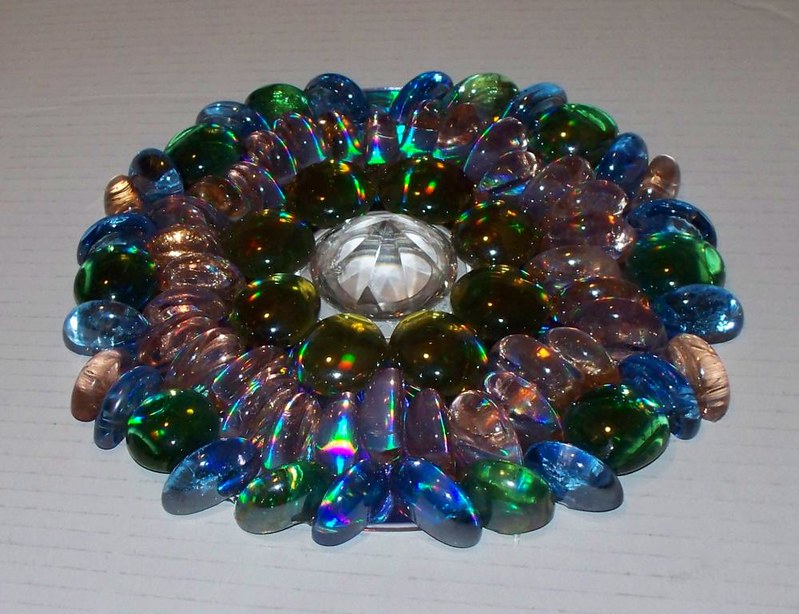
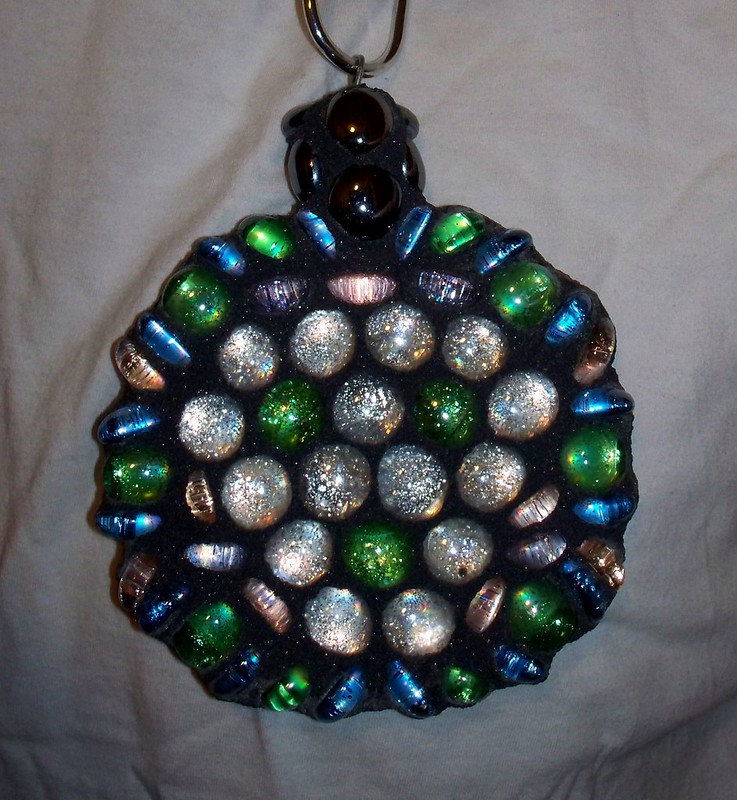
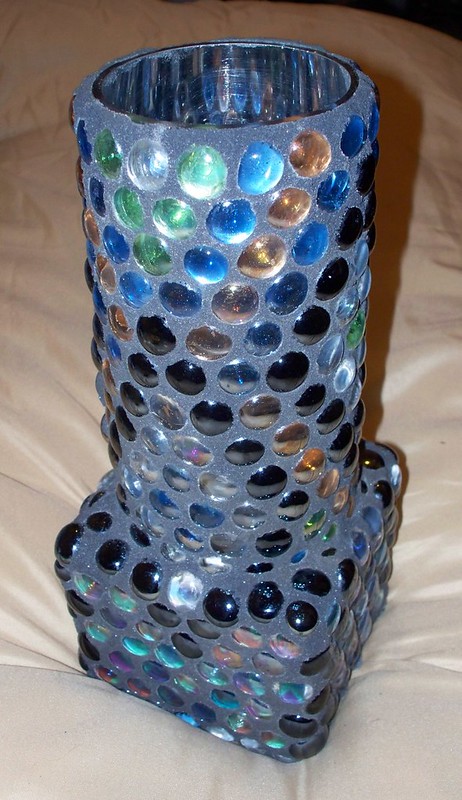
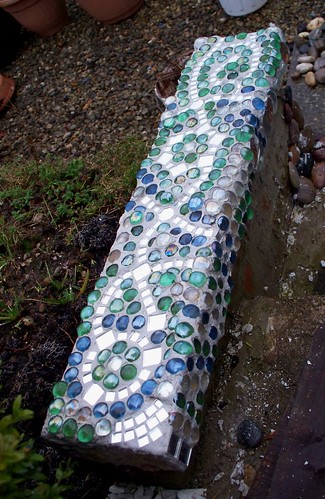
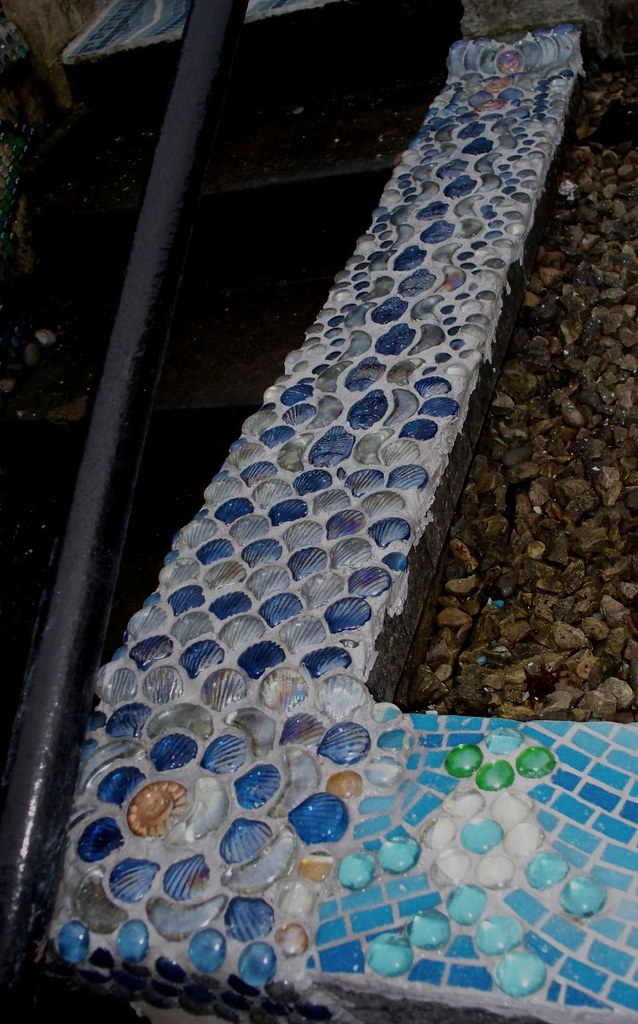
The Little Fellow At The End


No I do not know what was going through my head when I added this little fellow ;)  I just wanted a feature to finish it off really.  I've used a similar technique with the mirrors except they're under ALL the gems.  Anyway, it's staying now as I'm sure it'll be another feature that'll catch the sunlight :)

Grouting

I have grouted this mosaic as I've gone along simply to add more protection as I work.  Plus it means I don't have to cover as much of it up when it rains.

The tiling is all complete now and I just need to remove some of the excess grout and complete grouting the rest.  When it's complete it should be a nice little addition to the garden :)


Watch this space for further progress ;)

Mystery Mosaic Takes Shape ;)

This is a new one I began about Easter.  It's taking a while to actually get going as I'm doing it from a design I created on my computer.

I'm keeping the design of this one quiet for now as it's been planned and evolved for a long time.  Let's just say it's an evolved version of one I did previously ;)


For this creation I am using a large piece of foamboard with the intention of installing it out in the garden eventually :)  As can be seen from the image at this point I'd already measured some basic lines.


At a slightly more advanced stage much of the lines on this side are taking shape.  The mirror tiles seen above have simply been laid on at this point.


I'm very fond of using mirror tiles, specifically for outdoor projects as they're fabulous for catching the sunlight :)  And now here we see part of the design taking shape and some of the mirror tiles have been stuck down.


As you can see from above there has been some progress.  I've added some green and brown gold dust tiles and I've already got more gold tiles to add to make up a significant part of the design :)