04/01/2013

Coping Stone Mosaics and Walls

As you know I have been working to mosaic the coping stones in my garden to make it more attractive.  Four of them are already complete with another still work in progress and three still to be begun.  Here I present two of these and one wall.

Step Coping Stone Right No. 3 


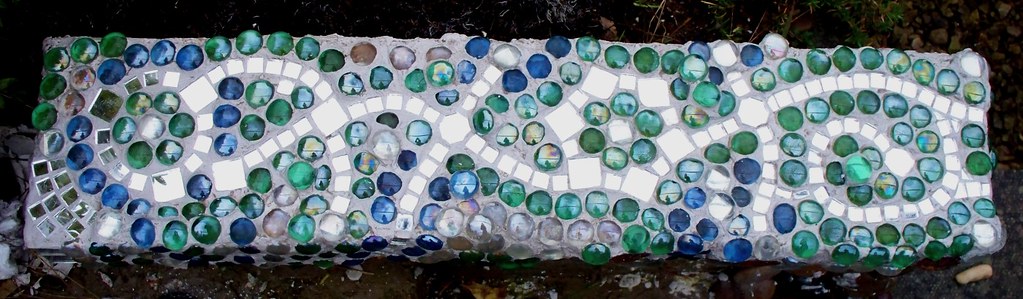
The first show is one that sits at the stop of the steps on the right.  This is actually a low wall I built myself over the summer.  There were no walls at the top before though there was evidence that there might have been low coping stones there at one point.  The soil level here on the right is level with the steps and could easily spill over.  I didn't plan it as a wall but it just sort of 'happened' as I was placing a barrier there to hold back the soil.  I also created a similar low wall on the other side to match, though the soil level there is much lower than the steps.  This one is still waiting to have mosaic applied.  The top step also needs raising to make it level with the others; plus the fact that the surface is heavily deteriorated.

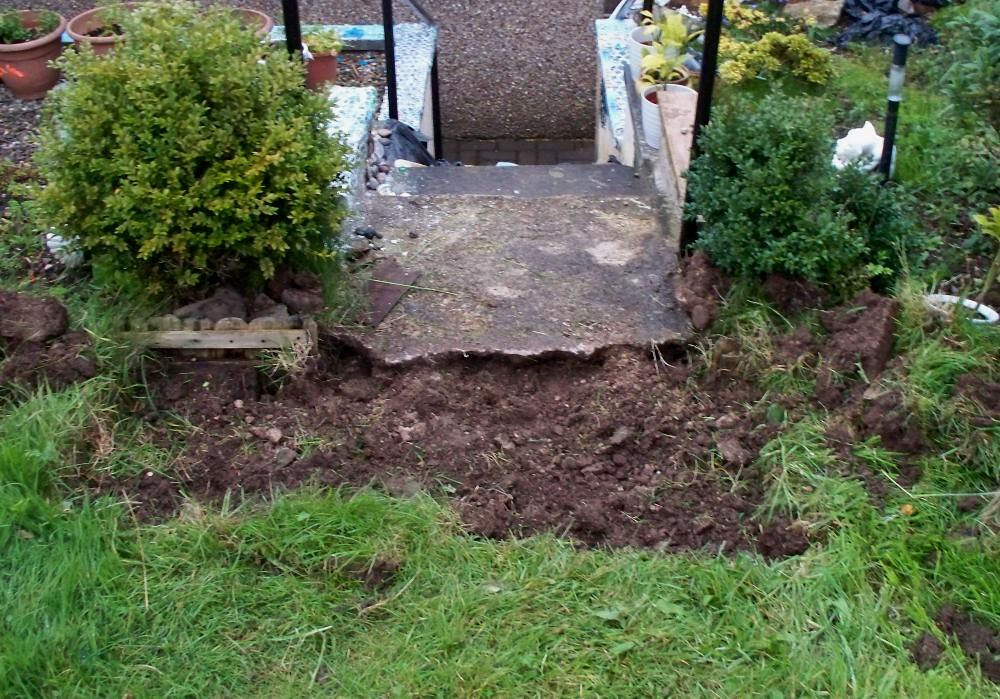
Above: The top step as seen from the lawn. It has been dug out in the foreground to allow the step to be extended into the garden.


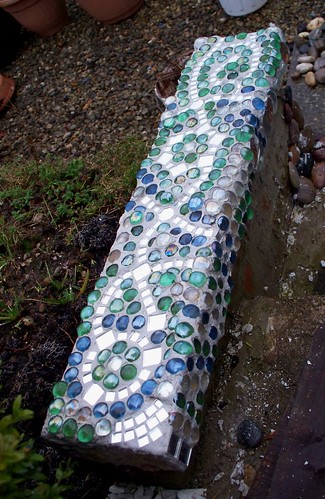
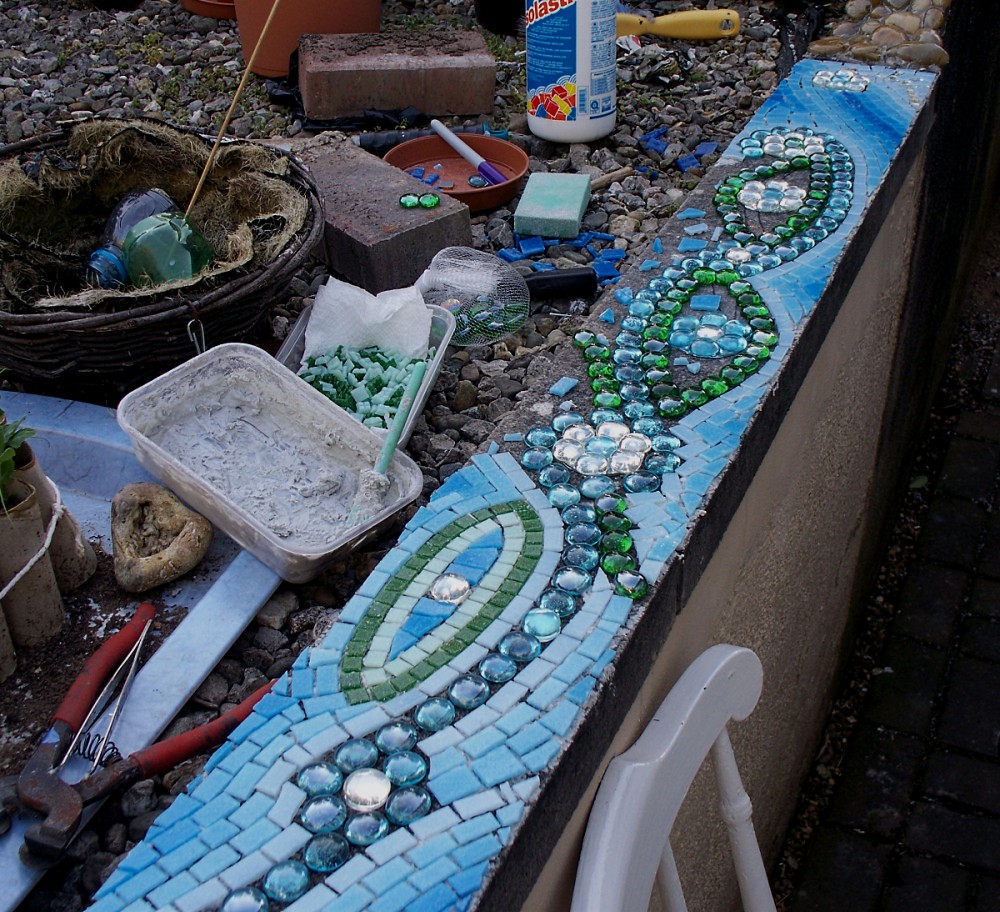
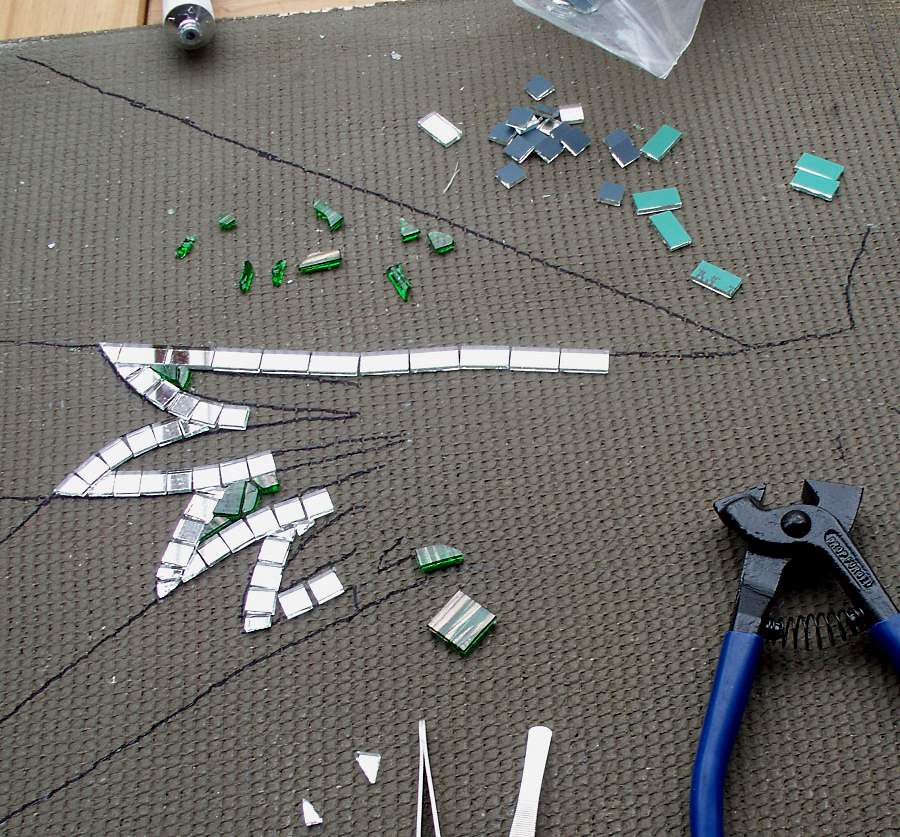
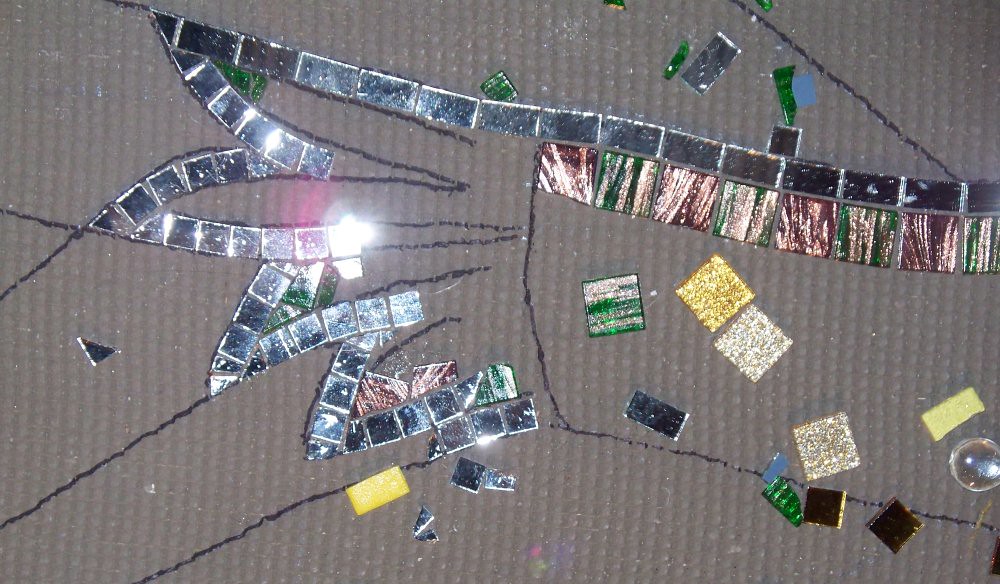
This low wall mosaic consists of a winding pattern made up of mirror tiles with blue and green glass gems filling in the gaps; there are also some clear glass gems above individual mirror tiles.  A silver-grey grout was used to complete it.  It took ages to clean off the excess grout due to me not being present and lots of bad weather.  But I'm now quite pleased with the result and cannot wait to start on more :-)

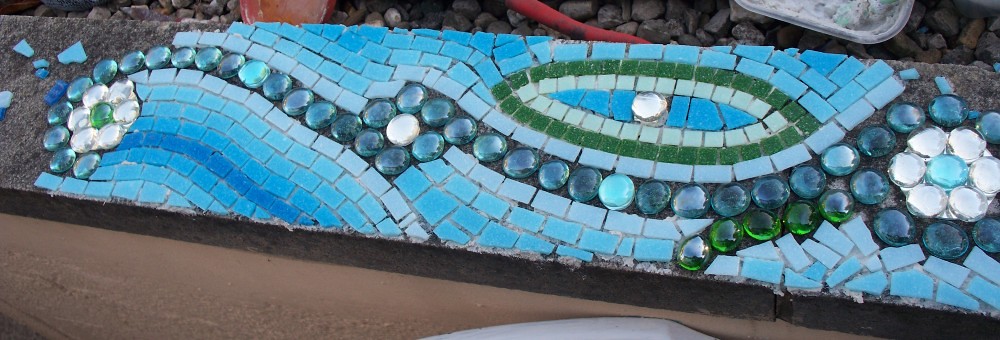
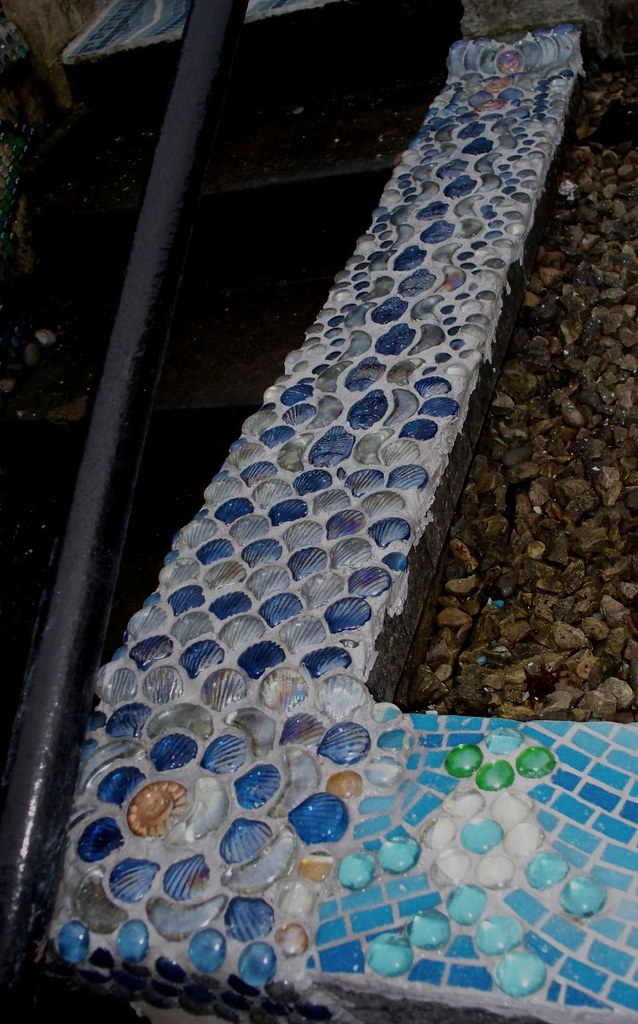
Step Coping Stone Right No. 1 


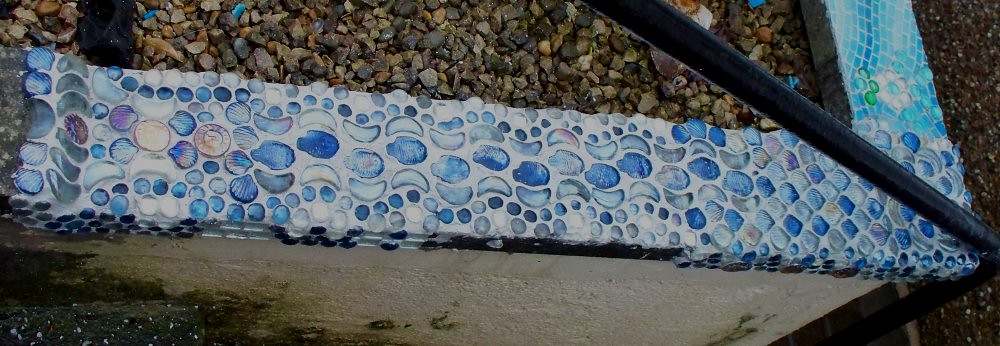
This is one of the longer coping stones which runs by the lower steps.  Apart from the side there are no tiles used on the top.  It consists of glass gems (blue and clear) and glass shapes consisting of moons, suns and shells.  Some of these have beautiful rainbows in them and really look fab in the sunlight :-)

I still have to finish the side of the coping stone and fill in a few minor pits where the grout was not present.  But these are only small things that can be done at a later date :-)


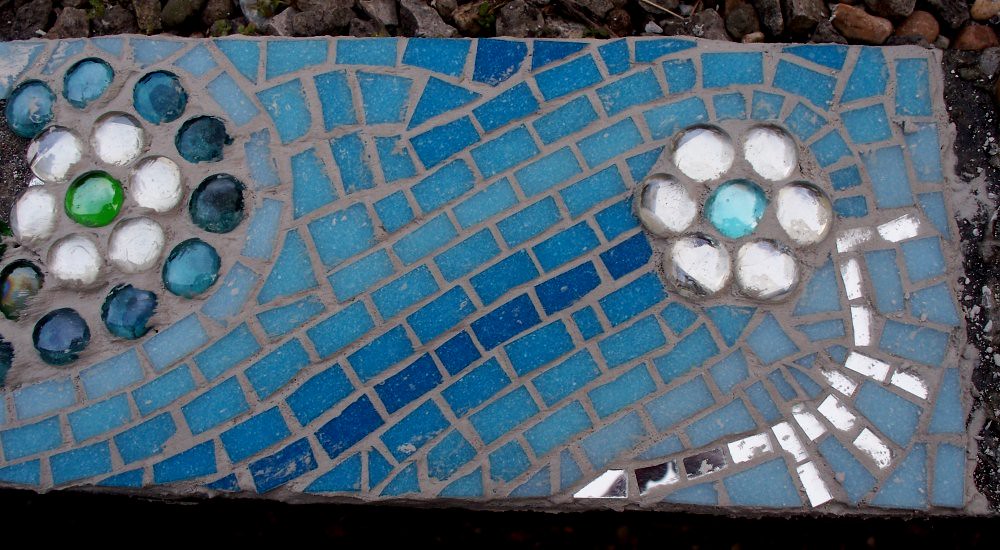
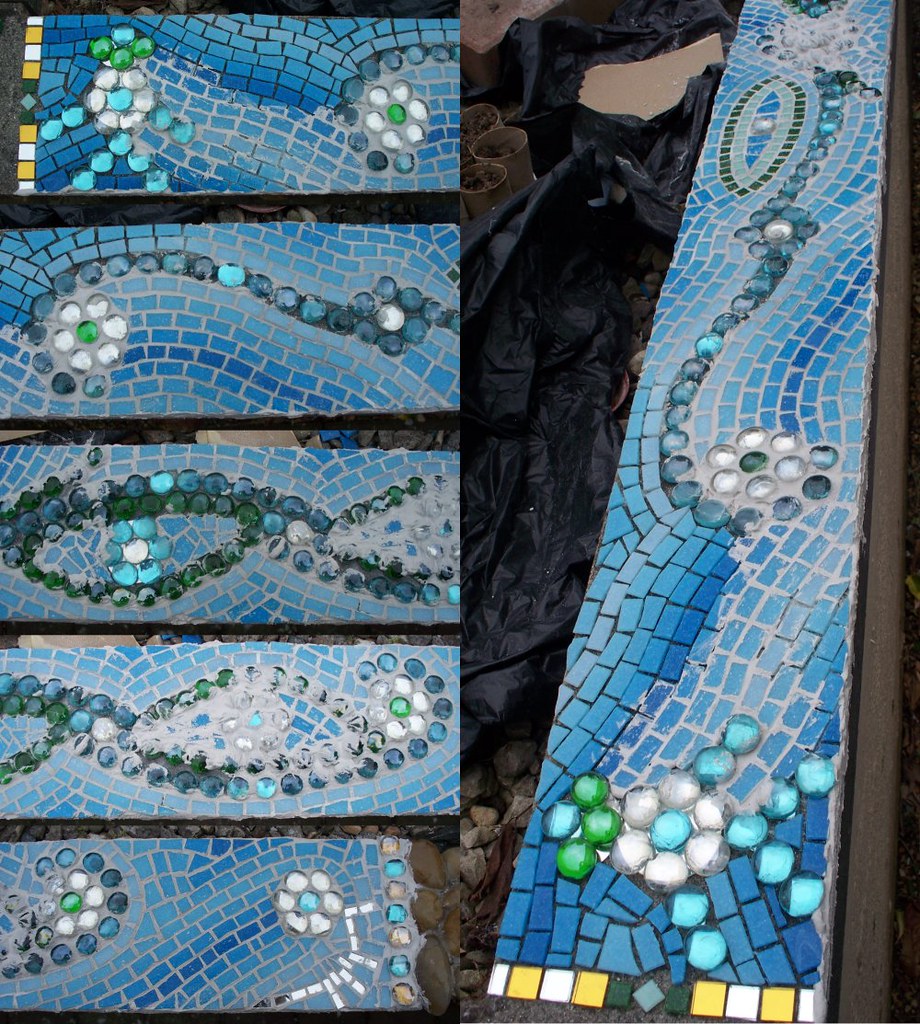
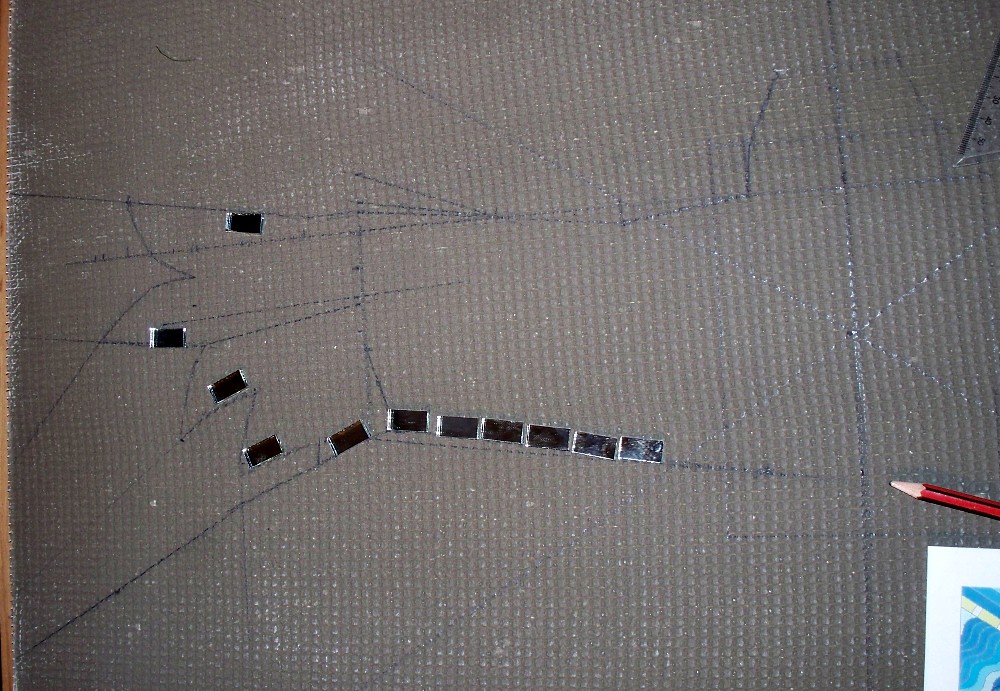
Like the coping stone opposite the design features 13 fish swimming downstream.  But this time they end at glass shell shapes (the shore?) and at the end is a sun/moon feature taking on a circular pattern.

Steps Wall Right No.1 - Peace and Happiness Mosaic


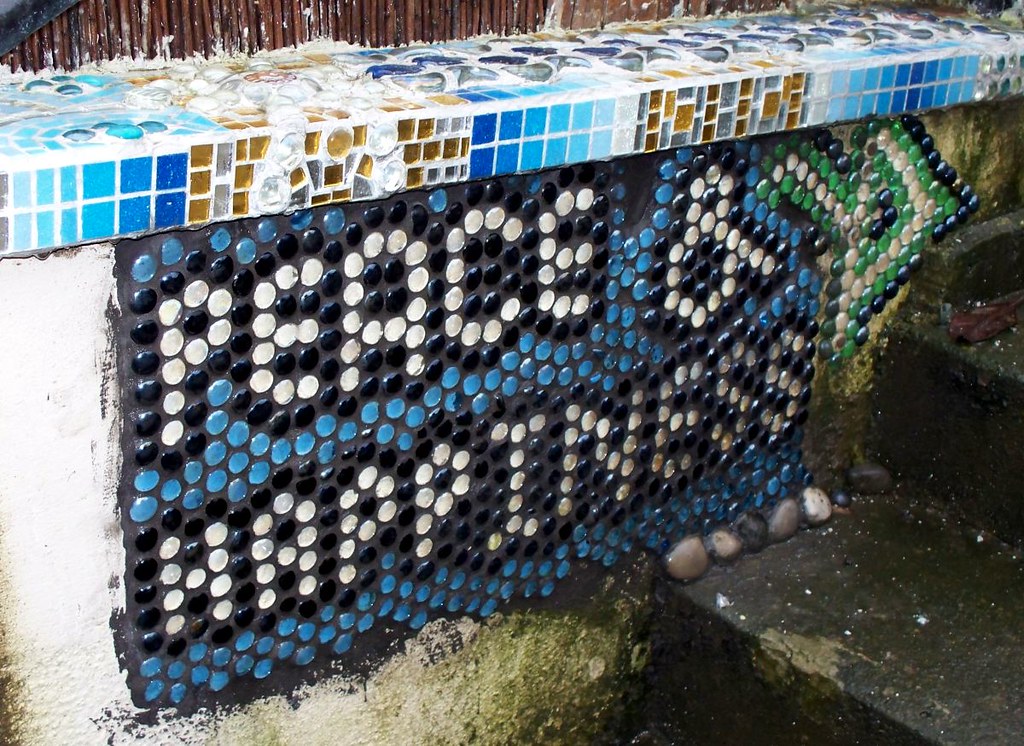
This is a mosaic I did rather quickly in September 2012.  It's quite a basic style using coloured and clear glass gems.  This mosaic can be seen very clearly from the window and the idea being that one would see this every morning; hopeful reminding oneself to include that in ones life :-)

As you can see there's still a bit of work that needs doing and the far right hand side needs grouting as well as some infilling.  I may add some of those polished pebbles to add some further interest to the area.

Peace and Happiness x

Yin Yang Step Mosaic


This is one which I actually created towards the end of the summer; however, it's only recently which I've had the chance to clean it up and photograph it properly.

For the first time I used non-glazed porcelain tiles as it was on a surface I didn't want people slipping on.  It features on one of the steps in the garden and hopefully the first of many; I am currently working on another as we speak.

The mosaic takes the theme of the sea again with its wavy blue patterns and shades.  I've actually only used two colours, but it's amazing what you can achieve when mixing shades :-)  There is a scroll-like border on either side which could also be used to represent the waves in the ocean.

The centrepiece is another attempt at Yin Yang, but this time in blue.  I'm hoping to continue the blue sea theme on other steps as well.


At the wall ends I've begun adding those flat polished stones you can get.  I've found them very good for patching up those hard to mosaic areas as well as adding an interesting infill between designs :-)

19/05/2012

Garden Wall Mosaics


I had always planned to cover the plain coping stones in our garden with mosaic but I hadn't intended to tile directly to the stones.  However, since we've had such good weather lately, I was feeling spontaneous and creative, so I went out and created two mosaic coverings.  One was a pebble mosaic which I'd only planned a few hours earlier on that day.  Even the word I included only came into my head as I was actually doing the mosaic!

The second mosaic was another spontaneous creation and because the design is a little more complex I'm actually still working on this one.

The Healing Mosaic


This particular wall didn't actually have a coping stone on top and is actually higher than the wall next to it.  It also sloped down to the other wall with a very crude and uneven surface.  I therefore decided that applying a pebble surface would help soften this bland surface and it has turned out rather well :)


The idea of including a word only came to me as I was actually applying the pebbles to the wall!  I'd wondered about adding darker pebbles to make a pattern as I was progressing and then I thought:

"Wouldn't it be lovely to include the word 'health' or 'healing' to the design using the really dark stones"

So this is how it turned out.  The 'H' is more of a brown colour as I'd not realised I had more of the darker pebbles to complete the mosaic.  It does emphasis the beginning a lot more; even if it was unintentional :)

Even though the pebbles were already polished I still added a couple of coats of Yacht varnish to seal it all.  Plus, it does make the surface more like a river bed now :)  And with that I come to my 2nd wall mosaic :)

The Blue Mosaic

Well, I was originally going to mosaic pieces of foamboard and then attach them to the coping stones later in case of bad weather.  However, the sun has been out a lot more than expected this year and I was just feeling so creative.  I just went out there with some glass gems and some spare round mirror tiles and created away :)


This is very much a mixed media mosaic and it's not something I've attempted in a while.  It's also been quite experimental but the effect has been amazing so far.

You see, I had these 5cm round mirror tiles and I'd found in the past, that because of how thin they are, they've cracked in the frosty conditions.  Now (I actually thought of this whilst working on yet another mosaic) I thought "What if I place glass gems on top of the mirrors in order to catch the sunlight?"  And it has so far been quite dazzling (in a good way).  This way the mirrors are kept secure underneath but still allow light to reflect off them through the glass gems; and even if the mirrors should crack, they'll still be in one place and still function as intended :)


I have used a mixture of coloured glass gems here; mainly blue, clear and green.  I didn't add mirrors to every one, but as well as the big mirrors, I also added smaller mirror tiles to underneath the odd glass gem.

The gems were all added first.  The tiling came later.  I used the same technique as I did for my Yin Yang mosaic.  This has allowed a shaded but wavy effect to be included.  In a way it represents the sea, but also a series of eyes, and whatever else people can make of it :)


The Little Fellow At The End


No I do not know what was going through my head when I added this little fellow ;)  I just wanted a feature to finish it off really.  I've used a similar technique with the mirrors except they're under ALL the gems.  Anyway, it's staying now as I'm sure it'll be another feature that'll catch the sunlight :)

Grouting

I have grouted this mosaic as I've gone along simply to add more protection as I work.  Plus it means I don't have to cover as much of it up when it rains.

The tiling is all complete now and I just need to remove some of the excess grout and complete grouting the rest.  When it's complete it should be a nice little addition to the garden :)


Watch this space for further progress ;)

Mystery Mosaic Takes Shape ;)

This is a new one I began about Easter.  It's taking a while to actually get going as I'm doing it from a design I created on my computer.

I'm keeping the design of this one quiet for now as it's been planned and evolved for a long time.  Let's just say it's an evolved version of one I did previously ;)


For this creation I am using a large piece of foamboard with the intention of installing it out in the garden eventually :)  As can be seen from the image at this point I'd already measured some basic lines.


At a slightly more advanced stage much of the lines on this side are taking shape.  The mirror tiles seen above have simply been laid on at this point.


I'm very fond of using mirror tiles, specifically for outdoor projects as they're fabulous for catching the sunlight :)  And now here we see part of the design taking shape and some of the mirror tiles have been stuck down.


As you can see from above there has been some progress.  I've added some green and brown gold dust tiles and I've already got more gold tiles to add to make up a significant part of the design :)

07/02/2012

New mosaics for the garden - WIP


Well, due to other commitments I am not able to engage in mosaic activity as much these days, however, I have begun a project to brighten up my own garden using some new methods; most importantly, use a backing :D

I'm currently working on covering up the plain concrete coping stones on some of the garden walls in order to add a bit of extra colour to the garden.


The above will be a sort of contemporary flower design.  From previous experience, I'm using mirror tiles which will hopefully sparkle in the sunlight.  This is designed to fit at one end of a coping stone, sort of like a full stop at the end.  I'm using bright bold colours here rather than shading as the intention is to catch the eye with bright warm colour.  This ensures positive feeling throughout the year.  Sometimes gardens can go a bit cold and unwelcoming in the darker days when everything dies back.

I should note that I've actually measured the dimensions properly for this one rather than just using random shapes or outlines.  It wasn't easy, but the results can be far more satisfying if you're trying to get something symmetrical :)

The next image is a different design.  I've taken the shading idea from the Yin Yang mosaic and added with mirror tiles to create the image of waves in the sea.


I don't have an exact location for this at the moment but it may well continue from the flower design.


Although it's not very clear here, I've again added some gold mirror tiles just add a bit more sparkle in there.  I'm really experimenting here as I usually stick to quite bold designs.  This is not actually fixed in position, nor is it in it's final location, but it gives an idea of how it will look once complete.

I am also in the process of creating a much larger mosaic inspired by the Condor mosaic, but I'll be keeping quiet about this one for now ;)

Not as easy as it looks....

The title pretty much says it all.  Doing a mosaic needs a lot of patience and determination, however it doesn't mean you cannot come up with satisfying results at the end.

I have to say I have made a few mistakes but I have learnt considerably from them.  Which brings me to the Condor Mosaic I have covered before.  It was, at the time, quite an achievement as it took me so long.  However, if I was to undertake anything similar now I would certainly be doing things differently.  For example, actually do the mosaic on a backing first so that I am able to work inside and in comfort.  You can see from the following images the circumstances I had to endure.


I considered attaching it straight to the concrete breeze blocks a quick and easy option.  What I hadn't bargained on was the weather during the year I created it!   Also, because the wall I attached it to wasn't flat, it was especially difficult to get the tiles as even as possible.  If anyone else is going to do a mosaic outside, I would strongly advice doing it on a backing first; much better to do these things in the comfort of a warm area rather than shivering under a garden parasol in the rain!

Another mistake I made involved the grouting.  Now, I had to pretty much get the grout on as quickly as possible and because of weather conditions and the angle of the mosaic, it wasn't so easy to wipe off the excess.  So, the grout dried, and stayed dry on the surface of the tiles for a while.  Not a good idea as I had to wait until dryer weather before I could remove it.  This involved continuously sanding it down with sandpaper and taking it off with various other tools, including the hammer and chisel!

I mean, once it was complete, I was very pleased with it and loved to see the mirror tiles sparkle in the bright sunlight.  But it was a terrible struggle to create.  Fortunately, I have learnt from my mistakes and have not been put off as a result.  Already I am embarking on a new project, this time with something to back it on first.  This will allow me to work as a well on a flat surface and thus spare some awkward positions which I previously had to endure on bare tarmac.

PHEW!!!

08/09/2011

New Mosaics and Updates


It's been a while since I've posted here but I've been busy with many other commitments.  Unfortunately this has mean I have unable to engage in any mosaic activity until very recently.

The mosaic seen here is my Yin Yang mosaic.  I began this one in 2010!  Just got round to completing it.

I did this on exterior foamboard like a similar seen below:


For the Yin Yang mosaic I used different methods to bring this piece to life.  I used various shades of blue tiles to add a 3D element to the design.  I also used three different shades of grout to pick out the individual elements of the piece.  It was very complicated trying to make sure I was using the right shades as I'd bought the blue tiles from a local DIY store where all the shades are mixed up on one mesh.


This is the first mosaic I have completed in 2011.  I am working on others right that I hope to be able to complete as soon as I can.

As this blog hasn't been updated in a while, here are a selection of other mosaics I completed in 2010:


This is the Sun Vase.  A complicated piece but not as fiddly as the cat I did earlier.


The back of the vase I used a more simple design which was a more contemporary version of my condor.


The Eye Vase and below my Eye Bowl:


The Eye Bowl is actually an MDF bowl which I had to measure carefully to get the eye in its central position.

30/04/2009

Mirror Tile Picture Frame


This was my first attempt at doing a picture frame. It took me a few days to do and the design I chose was a random one. It was a case of an idea that just came to me before I started. This has been grouted and the excess grout sanded off.


24/04/2009

Seahorse Mosaic

This was the first mosaic I did and took only a few days to complete.


For this design I used a large piece of slate for a backing. With this one I used ceramic tiles which were smashed to get the required shape. It wasn't the easiest way, as I discovered later, but this was my first attempt.

I applied a light coloured grout which I darkened slightly with cement; this allowed the white tiles to stand out more. The blue tiles round the outside of the seahorse were applied in a way to make them appear to be radiating outwards.

23/04/2009

Golden Cat


This is one I did in 2008. It took me a few months to complete. I used a poly cat garden ornament as a base and applied mirror tiles to the outside. I chose gold and red to make the design stand out.


The red tiles are actually red Galaxy Tiles which give an extra sparkling effect to them. The eyes are green mirror tiles to make them stand out from the rest of the colours.